

ARM Servers can be a handlful
So lately I’ve been investing into ARM architecture. I want something that’s interesting from a research perspective, but not so much of a foil to current computing that it’d be limiting - in fact, ARM architectures may actually accellerate my interests.
One thing that I’ve learned is that ARM64 does not provide BIOS booting, only EFI - ok, no problem. However, getting an ARM system to boot is sometimes challenging - my normal trick with stuffing a bunch of ISOs on a USB stick with Ventoy doesn’t work, and it physically pains me to burn ISOs individually to sticks.
Enter PXE Booting - man, this AVA Developer Platform kit I got is so cool, it can boot UEFI PXE and HTTP across all interfaces and IPv6! And it looks dope to boot…

Thing is, I’ve never understood PXE booting, but I was determined to get it working and for my whole lab, not just my new ARM systems.
So that’s what this article is all about: I have a Unifi Dream Machine Pro, how do I get it to do multi-arch PXE booting for X86_64 and ARM64?
Spoiler Alert: The Unifi Dream Machine Pro can’t do multi-arch PXE
I know, I know, we’ve built so much trust and rapport over these last few articles, you can’t believe I got you with a clickbait article title!
Honestly, I can’t believe you wouldn’t expect that of me - after all, I used to use the Archer voicemail intro as my own for years, just changing it up a bit every few weeks.
Anywho, fact of the matter is, the Unifi Dream Machine Pro cannot do multi-arch PXE booting - on it’s own. It can if you pass off the DHCP for the primary default network to ISC DHCPD - so that’s what we’ll do.
In order to get this all working we have to pass off the default network’s DHCP service to ISC DHCPD running externally, which is running along side all the other services needed for PXE booting: TFTP, FTP, HTTP, and NFS.
Make It Make Sense
Here’s how PXE booting works, more or less:
- PXE Client - a system during boot - requests an address via DHCP.
- DHCP Server responds, providing additional DHCP options like a TFTP server and a file to download that can be booted from
- PXE Client downloads the file from the TFTP server, continues to boot
So the UDMP can tell DHCP/PXE Clients about the filename and next-server DHCP Options, but it doesn’t have any mechanism or logic to variate them based on architecture - it’s just the one setting for any client, which doesn’t work with multiple architectures.
ISC DHCPD can variate the filename and next-server DHCP Options provided based on the detected architecture, so we’ll just tell the UDMP to relay the default network’s DHCP services to this ISC DHCPD service.
Network Architecture
So in your UDMP you should have a few Networks…
The Default Network is the one we have to swap out the DHCP on.
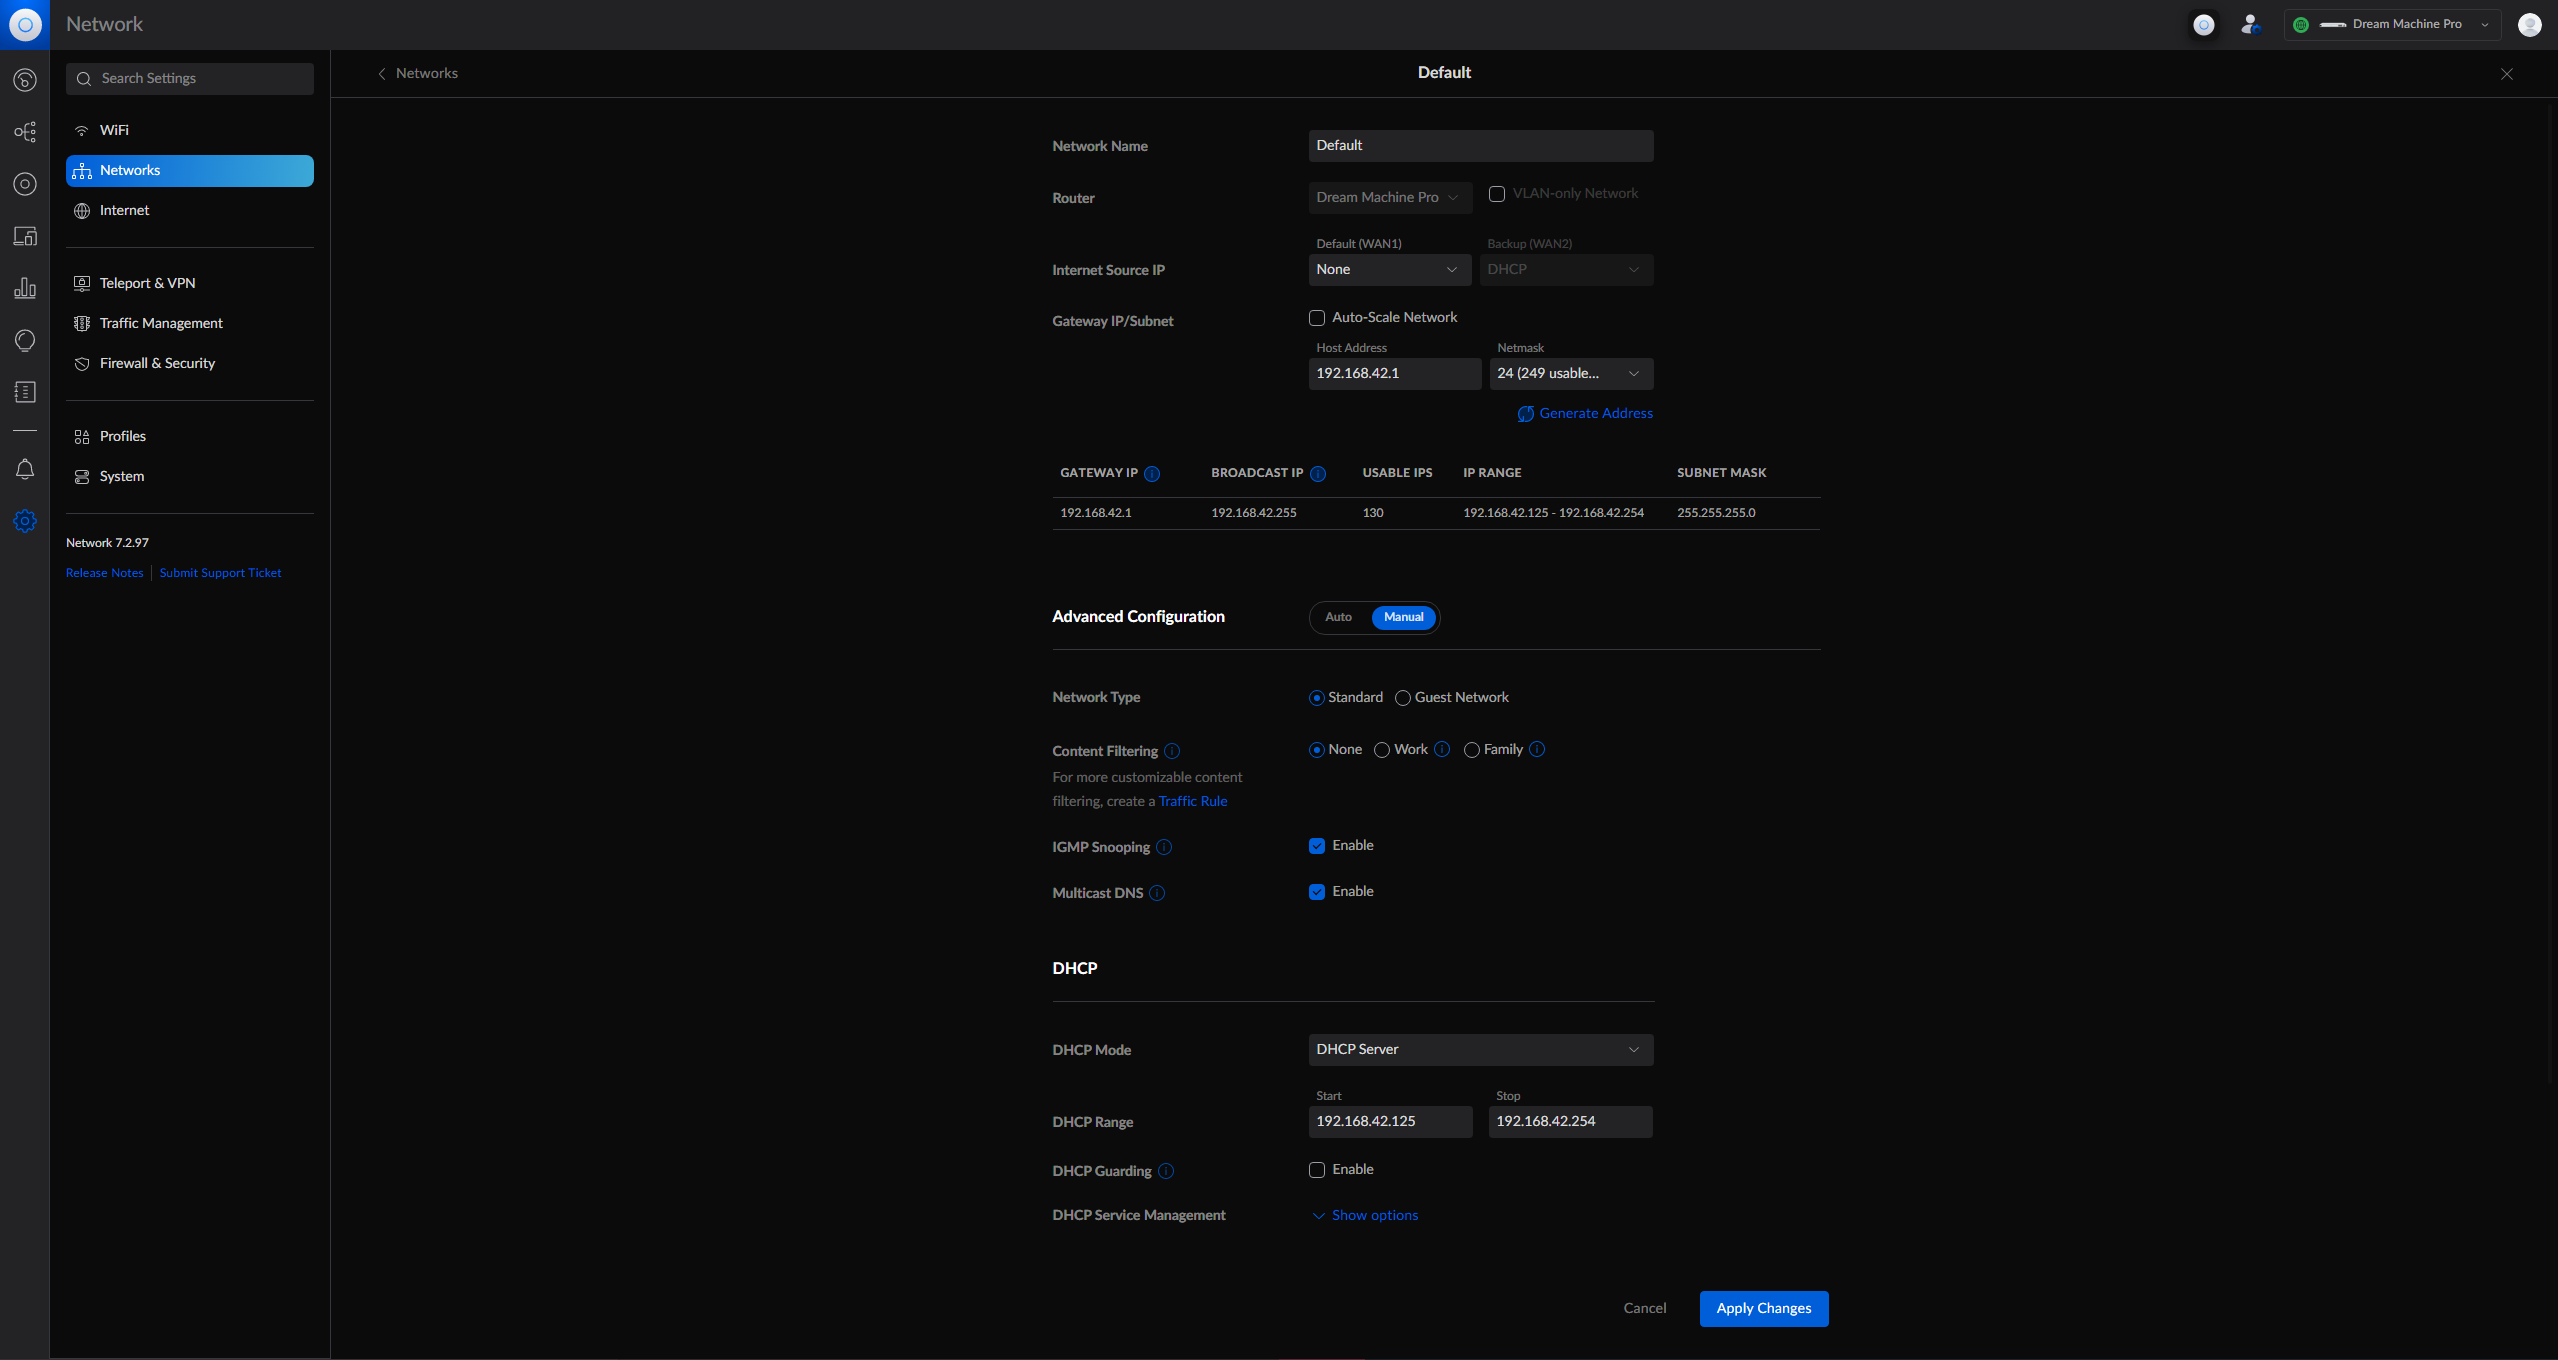
You should have a subnet that doesn’t have all the addresses set as dynamically requestable via DHCP. In my case, I have a Default Network that is configured as such:
- Subnet: 192.168.42.0/24
- Subnet Mask: 255.255.255.0
- Gateway IP: 192.168.42.1 (the UDMP)
- Broadcast IP: 192.168.42.255
- DHCP Range Start: 192.168.42.125
- DHCP Range End: 192.168.42.254
Yours may be different and that’s ok - as long as there are some non-dynamic IPs that can be statically set.
Reason being, your PXE server needs to have a static IP not in the DHCP range that it’ll be handing out - in my case this is 192.168.42.16 with a hostname of pxe.kemo.labs.
This configuration from the UDMP Default Network’s DHCP service is essentially going to be copied into PXE server’s ISC DHCPD service.
The Rest of the Gang
Now, PXE booting doesn’t work with just DHCP - there are plenty of other services needed like:
- TFTP: Trivial FTP to transfer the PXE bootloader files
- FTP: An option to transfer Initial Ramdisks, Kernels, Install Sources, etc
- HTTP: Another option to transfer those files!
- NFS: Another option to transfer those files cause Ubuntu can be picky!
Honestly those are the easy services, simple to install, little deviation outside of the default configuration, and they just do basic serving of files.
Create the PXE Server System
This could be something simple likes a Raspberry Pi, but these instructions will be for RPM-based systems - the configuration should be the same though, package names and paths may need to be swapped out a bit for Debian-based systems.
In my case, I’m going to use a KVM/Libvirt VM that auto-starts when the host auto-boots.
The easiest way to accomplish this is with a Kickstart file - then we’ll get to a login prompt in 2-3 steps and 3 commands.
Download the RHEL 9.1 Install DVD ISO
If you don’t have a free RHEL for Developers subscription already you should goto https://developers.redhat.com and sign up.
Then goto https://access.redhat.com and click on Downloads at the top, download the RHEL 9.1 Installation DVD ISO.
Creating the Kickstart file
Since I’ll be creating this VM on a Libvirt host, I’ll store the Kickstart file in /opt/pxe.ks.cfg for ease:
#version=RHEL9

###############################################################
### THINGS TO CHANGE!!!!!

# Set your hostname!
network --hostname=pxe.kemo.labs

# Set your for the PXE VM!
network --bootproto=static --device=enp1s0 --gateway=192.168.42.1 --ip=192.168.42.16 --nameserver=192.168.42.9,192.168.42.10 --netmask=255.255.255.0 --ipv6=auto --activate

# Set a root password and SSH Key for logging in!
# How to create a crypted password: https://access.redhat.com/solutions/221403

rootpw --iscrypted --allow-ssh $6$EtgdRzLPASS_HASH_HERES0
sshkey --username=root "ssh-rsa AAAAB3NzaC1yc2EAAAADAQABAAABAQC.../ey= YourPublicKeyHere"

# Change your language/locale/location maybe?
lang en_US.UTF-8
keyboard  --xlayouts='us'
timezone America/New_York --utc

###############################################################
### THINGS TO NOT CHANGE UNLESS YOU KNOW WHAT YOU'RE DOING!!!!!

# Installing from the network: https://access.redhat.com/documentation/en-us/red_hat_enterprise_linux/8/html/performing_an_advanced_rhel_installation/creating-installation-sources-for-kickstart-installations_installing-rhel-as-an-experienced-user
# Use FTP for install
# url --url=ftp://ftp_user:ftpPassword@ftp.example.com/rhv44-install-root-dir/
# Use HTTP for install
# url --url=http://server.example.com/rhv44-installation-tree-root-dir
#url --url=${VM_OS_LOCATION}
# Use NFS for install
# nfs --server=nfs://nfs_server.example.com --dir=/exports/rhv44
# Use CDROM for install
cdrom

bootloader --append="rhgb quiet crashkernel=auto"
firstboot --disable
eula --agreed
autopart --noswap --nohome --type=lvm --fstype=xfs
zerombr
clearpart --all --initlabel
selinux --enforcing
firewall --enabled --http --ssh --ftp
reboot
text

%packages
@^minimal-environment
kexec-tools
bash-completion
cockpit
git
jq
make
selinux-policy-devel
nano
wget
openssl
oddjob
curl
%end

%addon com_redhat_kdump --enable --reserve-mb='auto'

%end
Creating the VM
If you’re not doing this on Libvirt, then of course skip this step - if you are, here’s a handy-dandy bit of Bash you can spray and pray:
# Set the RHEL ISO Path
RHEL_ISO_PATH="/opt/rhel9.1-x86_64.iso"
KICKSTART_PATH="/opt/pxe.ks.cfg"

# Set some variables?
VM_NAME="pxe"
VM_CORES="2"
VM_RAM="4096"
VM_NETWORK="bridge=containerLANbr0,model=virtio"
VM_DISK_SIZE="120"

# Create VM Disk, 120G should hold about 15 distros comfortably
sudo qemu-img create -f qcow2 /var/lib/libvirt/images/vm-${VM_NAME}.qcow2 ${VM_DISK_SIZE}G

# Create a VM
sudo virt-install --connect="qemu:///system" --name=${VM_NAME} \
 --vcpus "sockets=1,cores=${VM_CORES},threads=1" --memory=${VM_RAM} \
 --network "${VM_NETWORK}" \
 --os-variant="rhel9.1" --location $RHEL_ISO_PATH \
 --disk "size=${VM_DISK_SIZE},path=/var/lib/libvirt/images/vm-${VM_NAME}.qcow2,cache=none,format=qcow2" \
 --initrd-inject "${KICKSTART_PATH}" --extra-args "inst.ks=file:/$(basename $KICKSTART_PATH) console=tty0 console=ttyS0,115200n8" \
 -v --memballoon none --cpu host-passthrough --autostart --noautoconsole --virt-type kvm --features kvm_hidden=on --controller type=scsi,model=virtio-scsi --graphics vnc,listen=0.0.0.0,tlsport=-1,defaultMode='insecure'

# Make the VM auto start when the host starts
sudo virsh autostart ${VM_NAME} --enable
You should then be able to view it in something like Cockpit with the cockpit-machines package installed, and see the installation automatically progress - once it does you’ll need to boot the VM to continue.
Configure the RHEL Subscription however you need - you just need the default BaseOS and AppStream repositories enabled to continue, which are typically enabled by default.
PXE Server Automation
You didn’t think I’d set out to automate system booting and not automate the functions of deploying said automated system booting service, did you?
This is going to be a shorter article than you’d probably expect since from this point out it’s mostly just forking a repo, configuring some YAML variables, downloading an ISO or two, and running some automation.
To progress you’ll also need Ansible installed - this can be done on the PXE server itself, or on another system like your local development terminal.
Fork it, Clone It, Quick - Rewrite it
Assuming you have a GitHub account, you should Fork that repository. This allows you to set up your own “source of truth” with your own distributions and whatnot.
Now that you have your own fork, Clone it down to your local editor/terminal, or wherever you’ll be running the Ansible automation - and yes it should work fine with Tower/Controller.
# Clone YOUR fork of the repo down
git clone git@github.com:YOUR_USERNAME/ansible-pxe-server.git

# Open in VSCode?
code ansible-pxe-server
Modifying Inventory
First thing you’ll probably want to do is set the Ansible Inventory to target your PXE server - if you chose to run the Playbook on the PXE server itself, thus connecting locally, your inventory file may look like this:
all:
  hosts:
    pxe.example.com:
      ansible_connection: local
      ansible_ssh_user: yourUser
      ansible_ssh_private_key_file: ~/.ssh/id_rsa
      ansible_python_interpreter: "{{ ansible_playbook_python }}"
Or, if you’re connecting to a remote host, just modify the target as needed in the default inventory file:
all:
  hosts:
    pxe.kemo.labs:
      ansible_host: 192.168.42.16
      ansible_connection: ssh
      ansible_ssh_user: kemo
      ansible_ssh_private_key_file: ~/.ssh/MasterKemoKey
Modifying Variables - Service Configuration
You’ll need to provide some variables to this Playbook in order for it to work - most of them are commented at the top of the Playbook, but the important ones you need to override can be put in a separate variable file and provided at runtime. Here’s the list you should probably pay attention to at a minimum:
###################################
# General Configuration

# pxe_server_name: The FQDN of the PXE Server
pxe_server_name: pxe.kemo.labs

# pxe_server_ip: The PXE Server IP
pxe_server_ip: 192.168.42.16

###################################
# ISC DHCPD Configuration

# dhcp_subnet: The subnet, sands the netmask
dhcp_subnet: 192.168.42.0

# gateway_router_ip: The Router IP, your UDMP IP
gateway_router_ip: 192.168.42.1

# dhcp_netmask: Full length subnet mask
dhcp_netmask: 255.255.255.0

# dhcp_range_start: What IP to start the DHCP pool at
dhcp_range_start: 192.168.42.125

# dhcp_range_end: What IP to end the DHCP pool at
dhcp_range_end: 192.168.42.254

# domain_name: DHCP Domain
domain_name: kemo.labs

# domain_name_servers: A comma separated list of DNS servers that DHCP clients should be provided
domain_name_servers: "192.168.42.9, 192.168.42.10"

# ntp_server_ip: NTP Server provided to DHCP clients, I have this running on my NAS, you can set it to your UDMP
ntp_server_ip: 192.168.42.48

###################################
# Banner Messages for Services

vsftpd_banner_message: Welcome to Kemo Labs FTP service.
pxe_menu_x86_bios_title: Kemo Labs PXE Boot x86_64 BIOS
Notice how we basically just copied the DHCP configuration from the UDMP?
You can save those to a variable file like pxe-svc-cfg.yml and provide it at runtime with -e @pxe-svc-cfg.yml to override the defaults.
Modifying Variables - Distributions
Once the service configuration has been determined, we can start to get distros downloaded to boot from!
The distribution list is provided as a list of dictionaries, so something like this might be what you want to work around:
# Root-level distros var
distros:

  # Ubuntu Server 20.04 - x86_64
  - name: ubuntu2004serverx8664 # Each name has to be unique
    # displayName: Base display name presented in the menus
    displayName: Ubuntu 20.04 LTS Server
    # group: Grouping of distros, used for parent/child grouping structure
    group: ubuntu20.04
    # arch: architecture of the distro, options are `x86_64` and `aarch64`
    arch: x86_64
    # family: family of the distro, used for logic switching between boot requirements, options are `ubuntu` and `rhel`
    family: ubuntu

    # bios_kernel: where on the mounted ISO file is the BIOS kernel located
    bios_kernel: casper/vmlinuz
    # bios_initrd: where on the mounted ISO file is the BIOS initrd located
    bios_initrd: casper/initrd
    # efi_kernel: where on the mounted ISO file is the EFI kernel located
    efi_kernel: casper/vmlinuz
    # efi_initrd: where on the mounted ISO file is the EFI initrd located
    efi_initrd: casper/initrd

    # Either isoURL or isoSrcPath need to be provided
    # isoURL: URL to the ISO file
    #isoURL: https://releases.ubuntu.com/20.04.5/ubuntu-20.04.5-live-server-amd64.iso

    # isoSrcPath: Local filesystem path where the ISO is already provided
    #isoSrcPath: /mnt/nfs-isos/ubuntu-20.04.3-live-server-amd64.iso

    # protocol: Protocol to use to boot the second stage installation, and to present as an installation source
    protocol: http

    # boot_methods to support with this distro, BIOS and EFI are supported on x86_64, only EFI is supported on ARM64
    boot_methods:
      - BIOS
      - EFI

    # efi_options: EFI boot menu generation options to support with this distro, `gui-install`, `text-install`, and `rescue-install` are options.
    efi_options:
      - gui-install

    # Special EFI Variables - Per arch, you need an EFI Grub2 Bootloader from one distro
    # efi_loader_seed: Boolean that toggles if this distro's Grub2 Bootloader should be used as the menu
    efi_loader_seed: false
    # efi_loader_path: Path on the ISO that has the BOOTX64.EFI,grub.cfg,grubx86.efi or BOOTAA64.EFI,grubaa64.efi,grub.cfg file sets
    efi_loader_path: EFI/BOOT/ # trailing slash is important!

  #======================================================================================
  # Extra Examples across archs, boot methods, and distros

  # Ubuntu Server 22.04 - ARM64
  - name: ubuntu2204serverarm64
    displayName: Ubuntu 22.04 LTS Server
    group: ubuntu22.04
    efi_kernel: casper/vmlinuz
    efi_initrd: casper/initrd
    arch: aarch64
    family: ubuntu
    isoURL: https://cdimage.ubuntu.com/releases/22.04/release/ubuntu-22.04.2-live-server-arm64.iso
    protocol: http
    boot_methods:
      - EFI
    efi_options:
      - gui-install

  # Rocky 9.1 - x86_64
  - name: rocky91x8664
    displayName: Rocky Linux 9.1
    group: rocky91
    efi_kernel: images/pxeboot/vmlinuz
    efi_initrd: images/pxeboot/initrd.img

    # Special EFI Variables - Per arch, you need an EFI Grub2 Bootloader from one distro
    # efi_loader_seed: Boolean that toggles if this distro's Grub2 Bootloader should be used as the menu
    efi_loader_seed: true
    # efi_loader_path: Path on the ISO that has the BOOTX64.EFI,grub.cfg,grubx86.efi or BOOTAA64.EFI,grubaa64.efi,grub.cfg file sets
    efi_loader_path: EFI/BOOT/ # trailing slash is important!

    arch: x86_64
    family: rhel
    isoURL: https://download.rockylinux.org/pub/rocky/9/isos/x86_64/Rocky-9.1-x86_64-dvd.iso
    protocol: ftp
    boot_methods:
      - EFI
    efi_options:
      - gui-install
      - text-install
      - rescue-install

  # Rocky 9.1 - ARM64
  - name: rocky91arm64
    displayName: Rocky Linux 9.1
    group: rocky91
    efi_kernel: images/pxeboot/vmlinuz
    efi_initrd: images/pxeboot/initrd.img

    # Special EFI Variables - Per arch, you need an EFI Grub2 Bootloader from one distro
    # efi_loader_seed: Boolean that toggles if this distro's Grub2 Bootloader should be used as the menu
    efi_loader_seed: true
    # efi_loader_path: Path on the ISO that has the BOOTX64.EFI,grub.cfg,grubx86.efi or BOOTAA64.EFI,grubaa64.efi,grub.cfg file sets
    efi_loader_path: EFI/BOOT/ # trailing slash is important!

    arch: aarch64
    family: rhel
    isoURL: https://download.rockylinux.org/pub/rocky/9/isos/aarch64/Rocky-9.1-aarch64-dvd.iso
    protocol: http
    boot_methods:
      - EFI
    efi_options:
      - gui-install
      - text-install
      - rescue-install

  # RHEL 8.6 - x86_64
  - name: rhel86x8664
    displayName: Red Hat Enterprise Linux 8.6
    group: rhel86
    bios_kernel: images/pxeboot/vmlinuz
    bios_initrd: images/pxeboot/initrd.img
    efi_kernel: images/pxeboot/vmlinuz
    efi_initrd: images/pxeboot/initrd.img
    arch: x86_64
    family: rhel
    # This ISO is already available via NFS due to how you have to auth to download RHEL
    isoSrcPath: /mnt/nfs-isos/rhel8.6-x86_64.iso
    protocol: ftp
    boot_methods:
      - BIOS
      - EFI
    efi_options:
      - gui-install
      - text-install
      - rescue-install

  # RHEL 8.6 - ARM64
  - name: rhel86arm64
    displayName: Red Hat Enterprise Linux 8.6
    group: rhel86
    efi_kernel: images/pxeboot/vmlinuz
    efi_initrd: images/pxeboot/initrd.img
    arch: aarch64
    family: rhel
    # This ISO is already available via NFS due to how you have to auth to download RHEL
    isoSrcPath: /mnt/nfs-isos/rhel8.6-aarch64.iso
    protocol: http
    boot_methods:
      - EFI
    efi_options:
      - gui-install
      - text-install
      - rescue-install
You can store those variables in another separate file perhaps, like pxe-distros.yml. Maintain that list, update it when needed, and re-run the automation to drop in the files and modify the needed menus!
Ready, Steady, Go
At this point you should everything lined up and ready to go! Run the automation with something like the following:
ansible-playbook \
-i inventory \
-e @pxe-svc-cfg.yml \
-e @pxe-distros.yml \
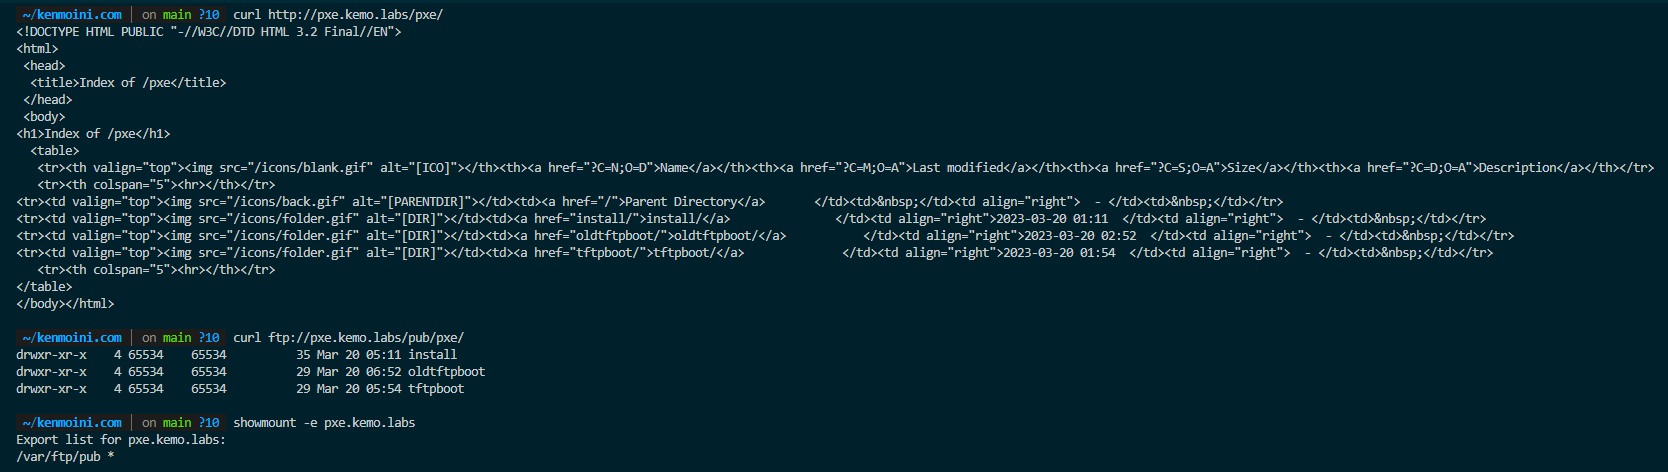
deploy.ymlDepending on how many distros it has to mirror, after a little while the automation should finish and you should be able to perform a few tests such as:
- Access the HTTP Server and view the mirrored content at:
curl http://pxe.example.com/pxe/ - Access the FTP server and view the mirrored content via:
curl ftp://pxe.example.com/pub/pxe/ - Check if the NFS mounts are exported via:
showmount -e pxe.example.com
Before we can continue to test the actual PXE booting process, we need to configure the UDMP with the bits needed to perform DHCP Relaying.
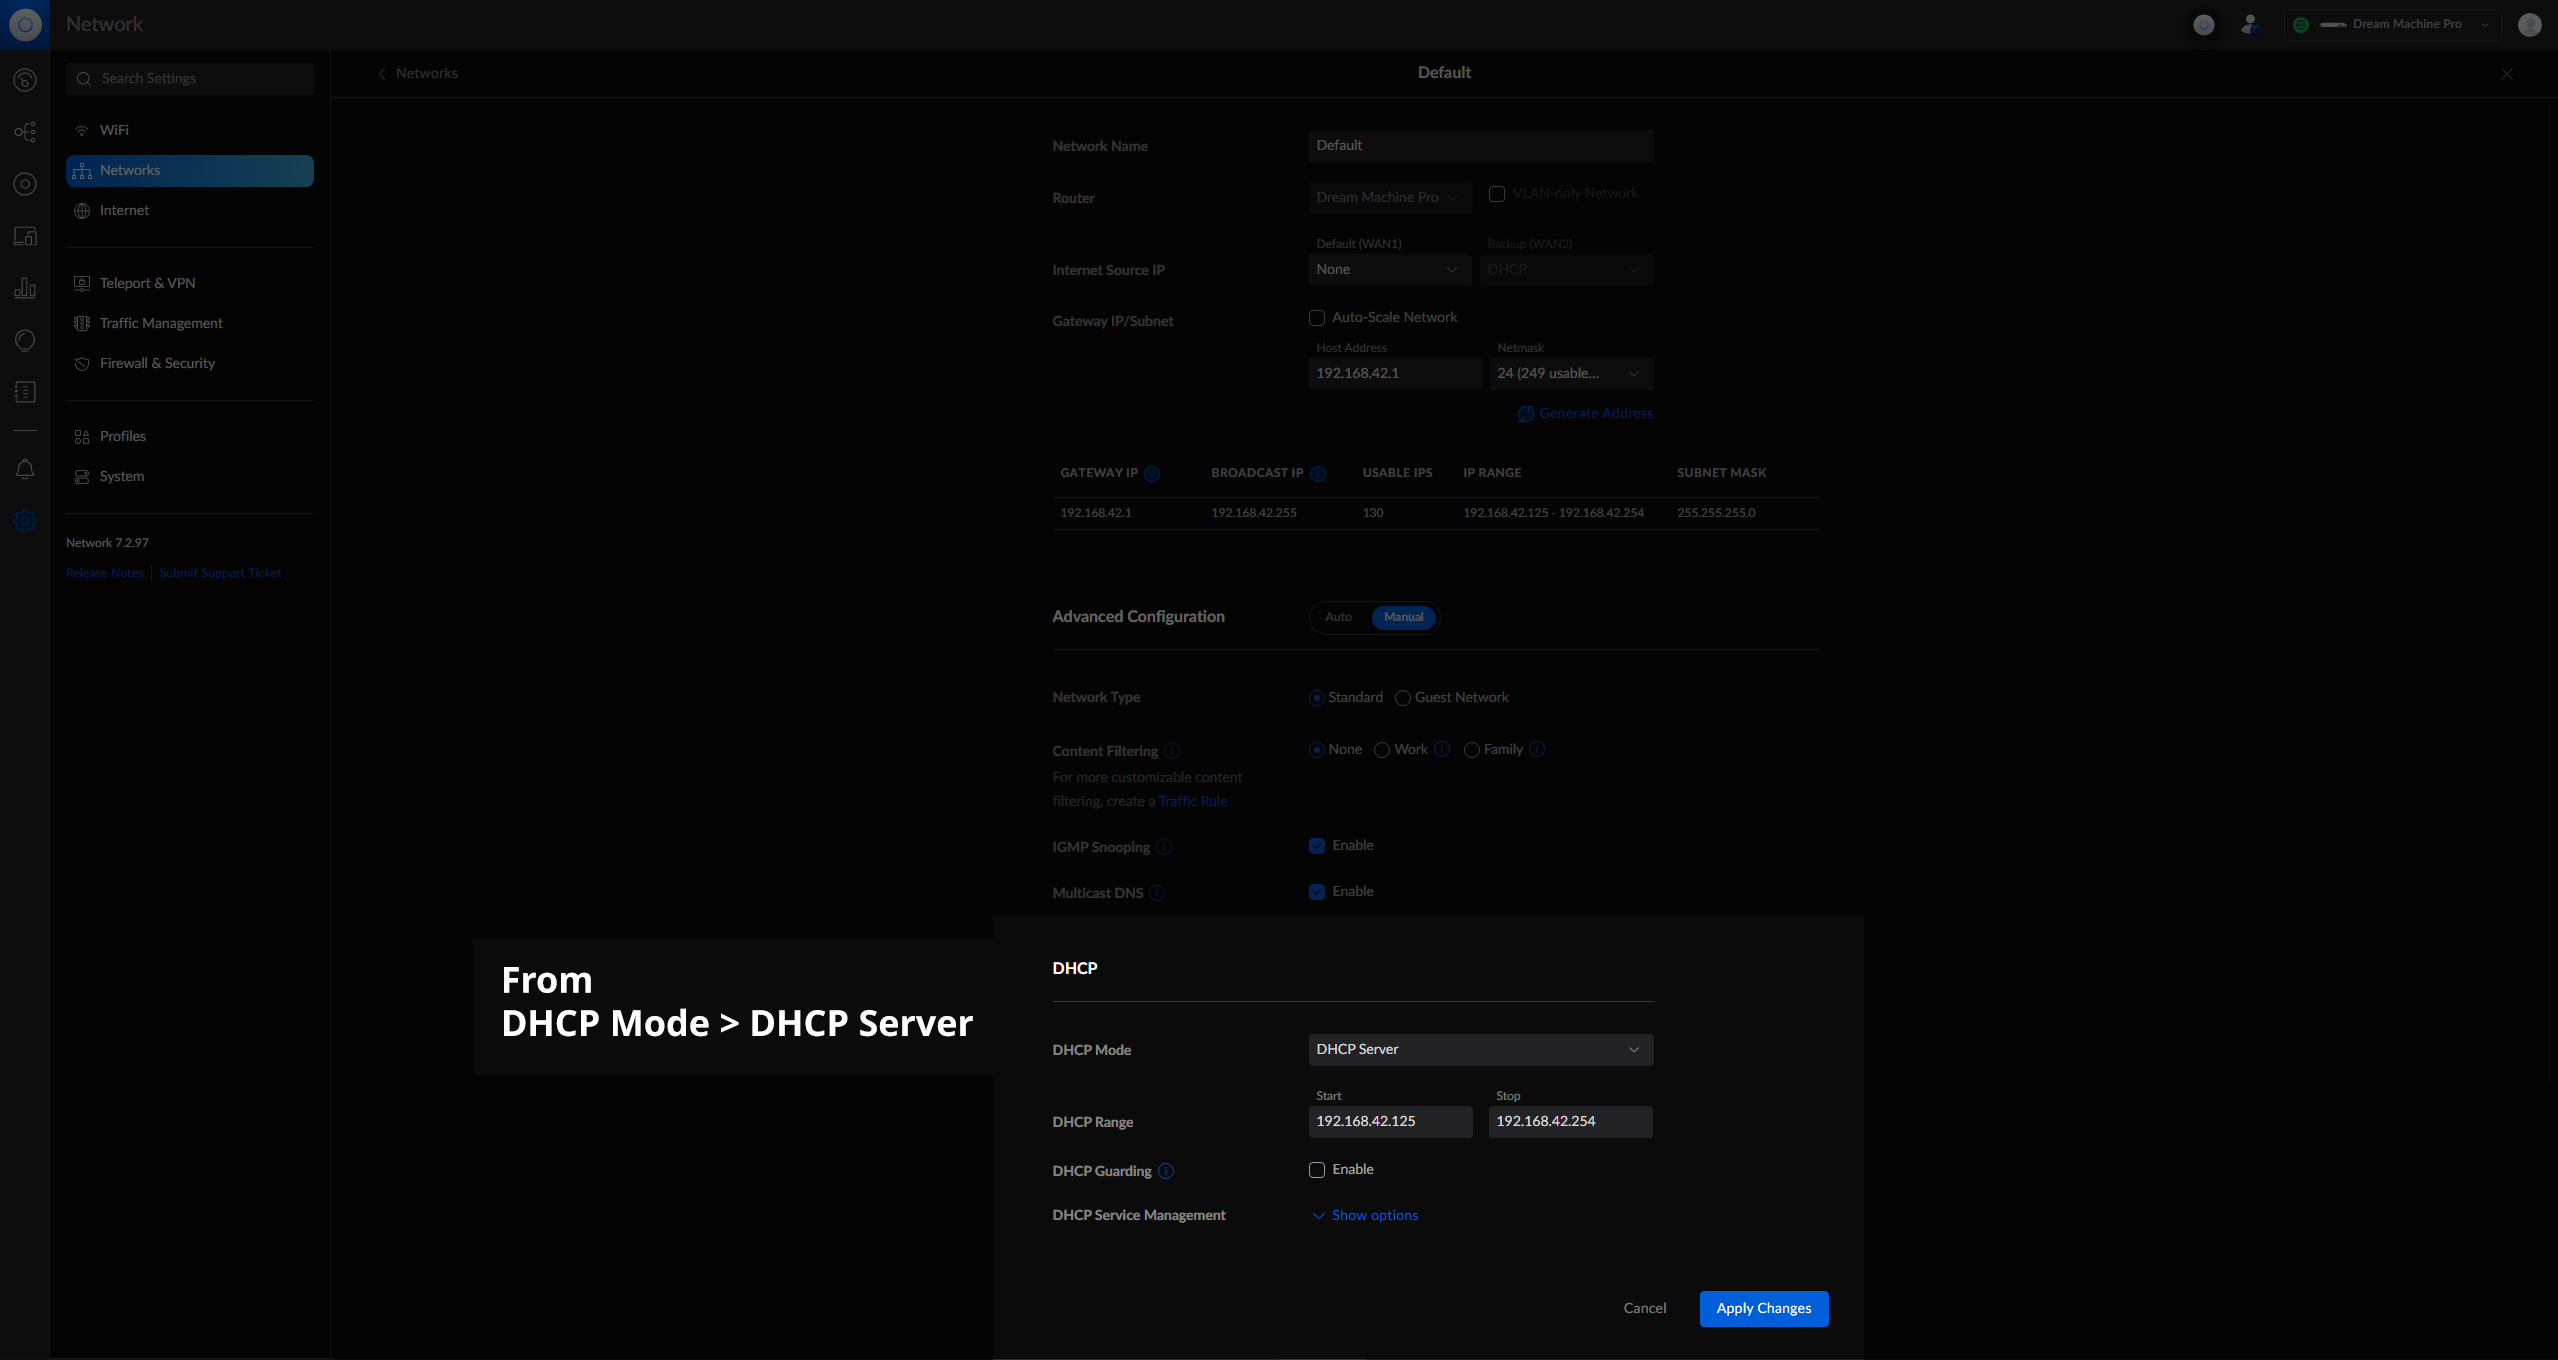
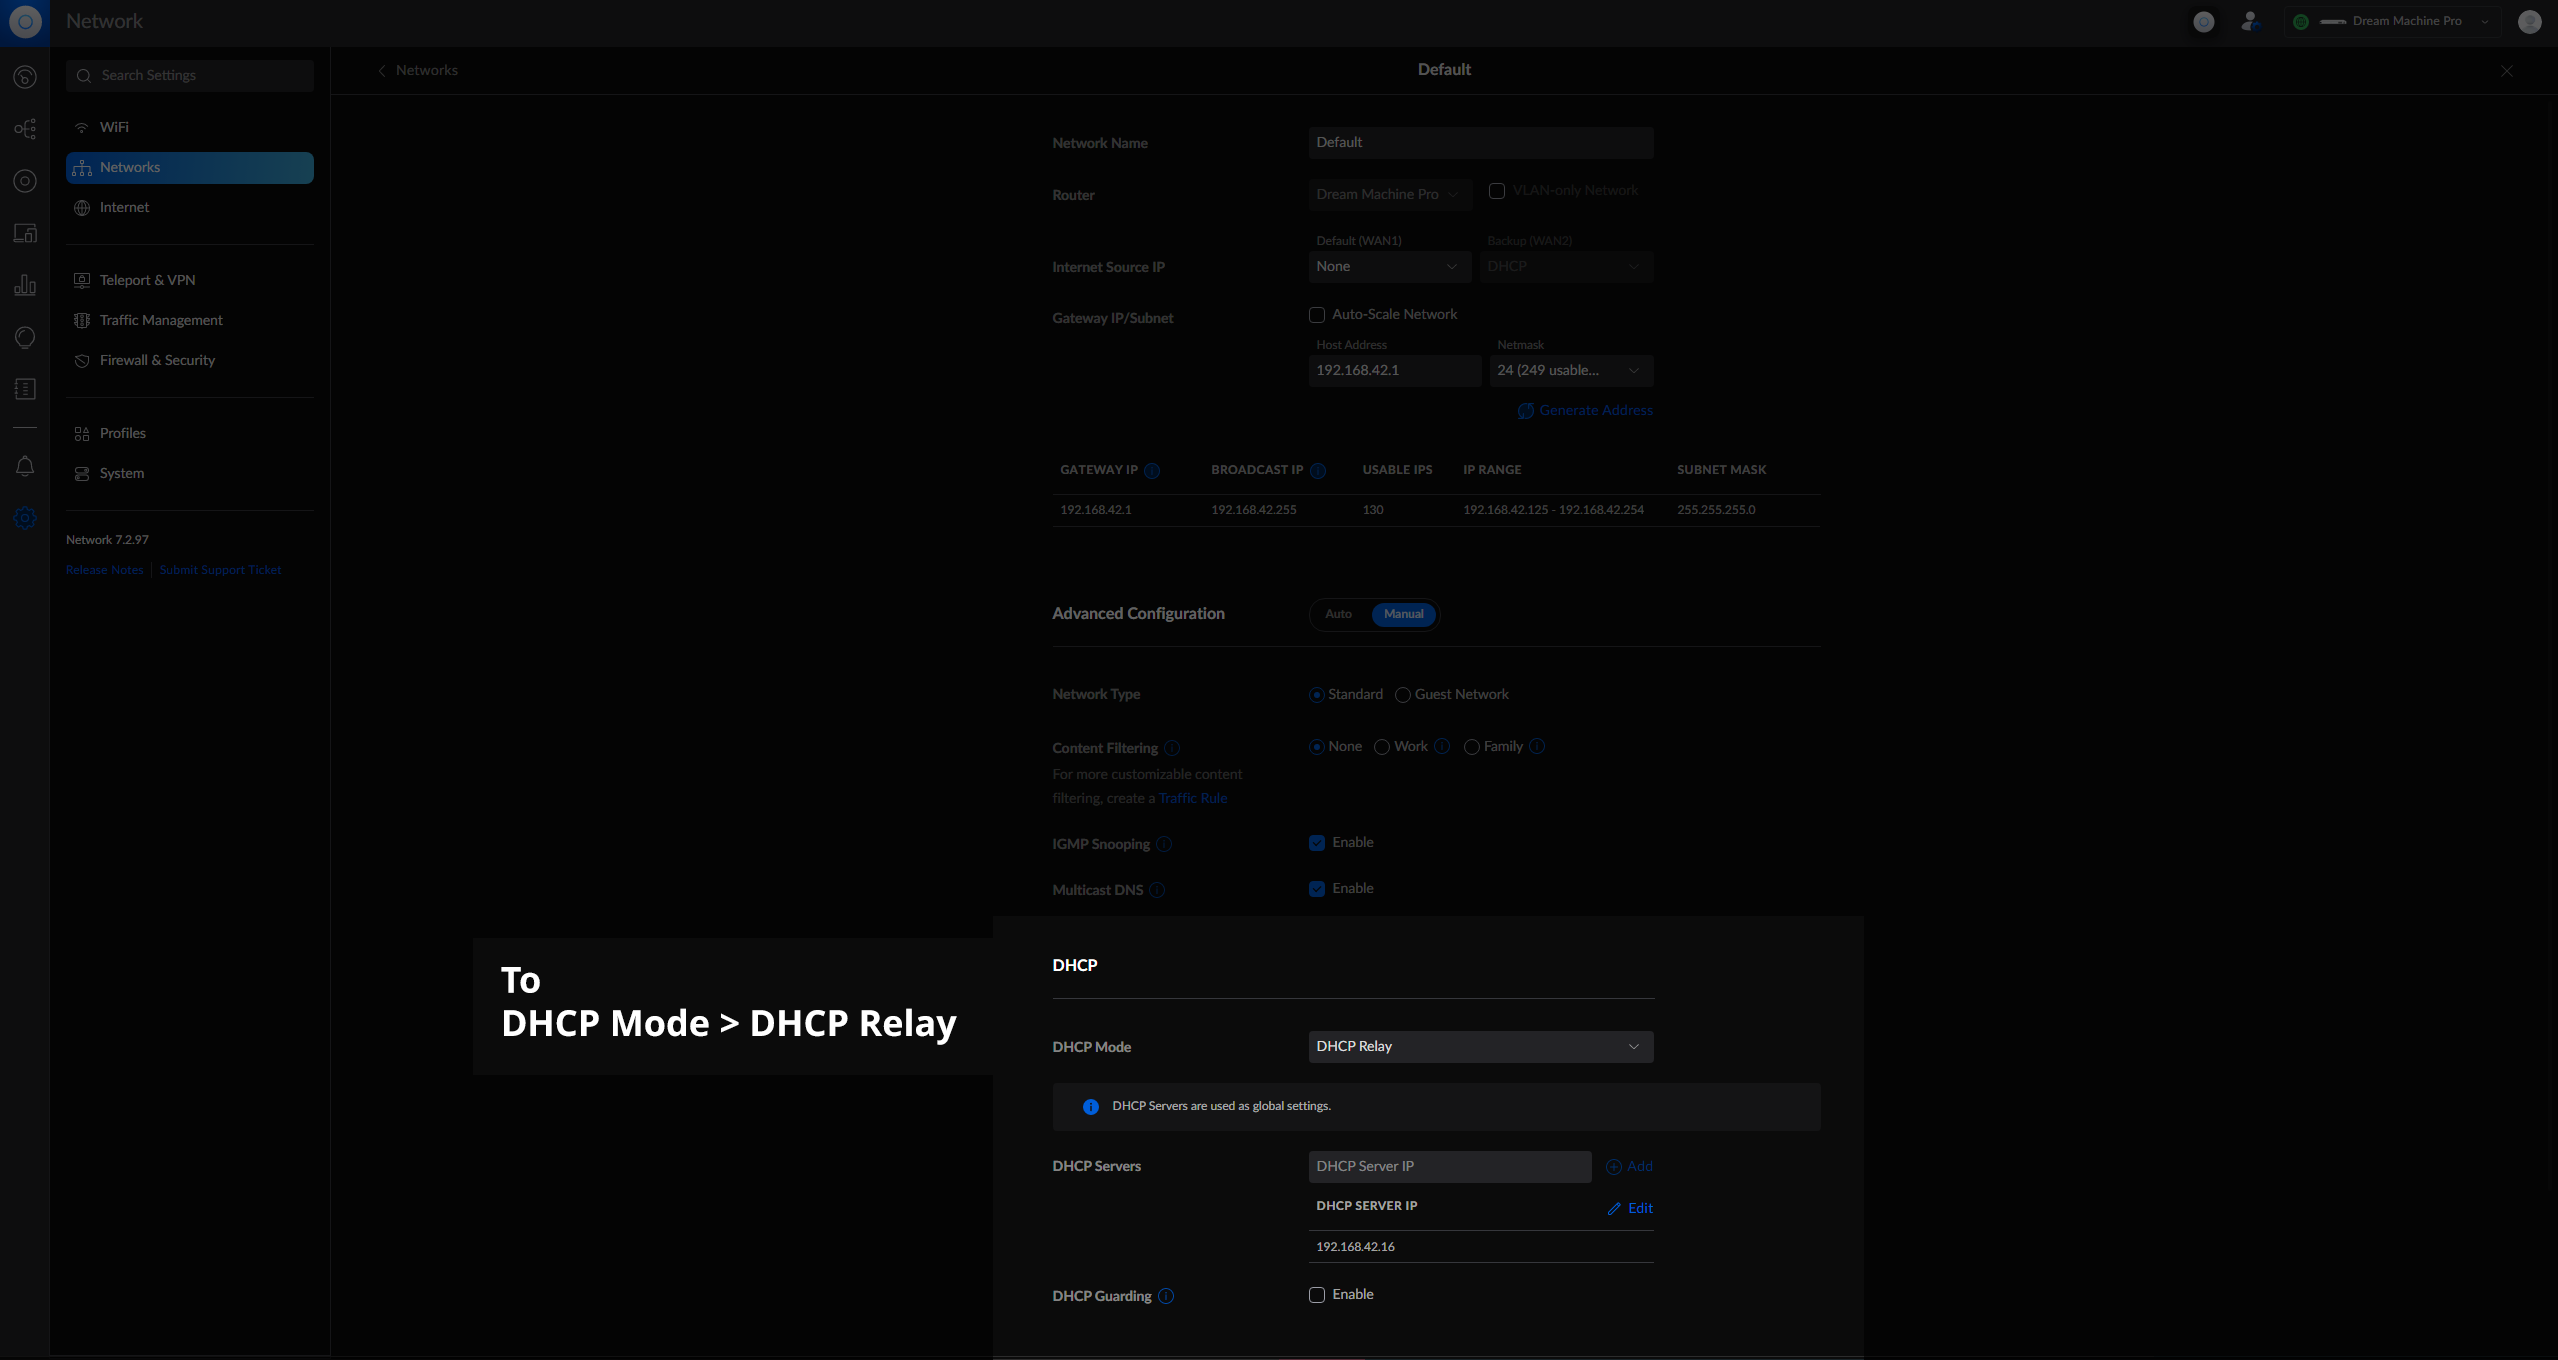
Configuring the UDMP
This is super easy too - just switch the Default Network from DHCP Server to DHCP Relay and give it the IP of the PXE server:
Now that you have a new DHCP server providing addresses, while things should continue to work just as they have, it may be a good time to just power cycle all your networked devices - or take the UDMP’s network offline for a little over an hour. This can be done at night, early in the morning, randomly while you’re sleeping - it’s just handy cause some devices do hiccup a bit, I know my Denon speakers and some other devices didn’t handle the swap gracefully without a power cycle. It just kinda depends on the device.
EZ PXE Client Testing
So the easiest way to test that I found was with some more Libvirt VMs - they too can boot via PXE, and either in BIOS or EFI mode.
To make things extra easy, just create the VM with Cockpit and the cockpit-machines interface:
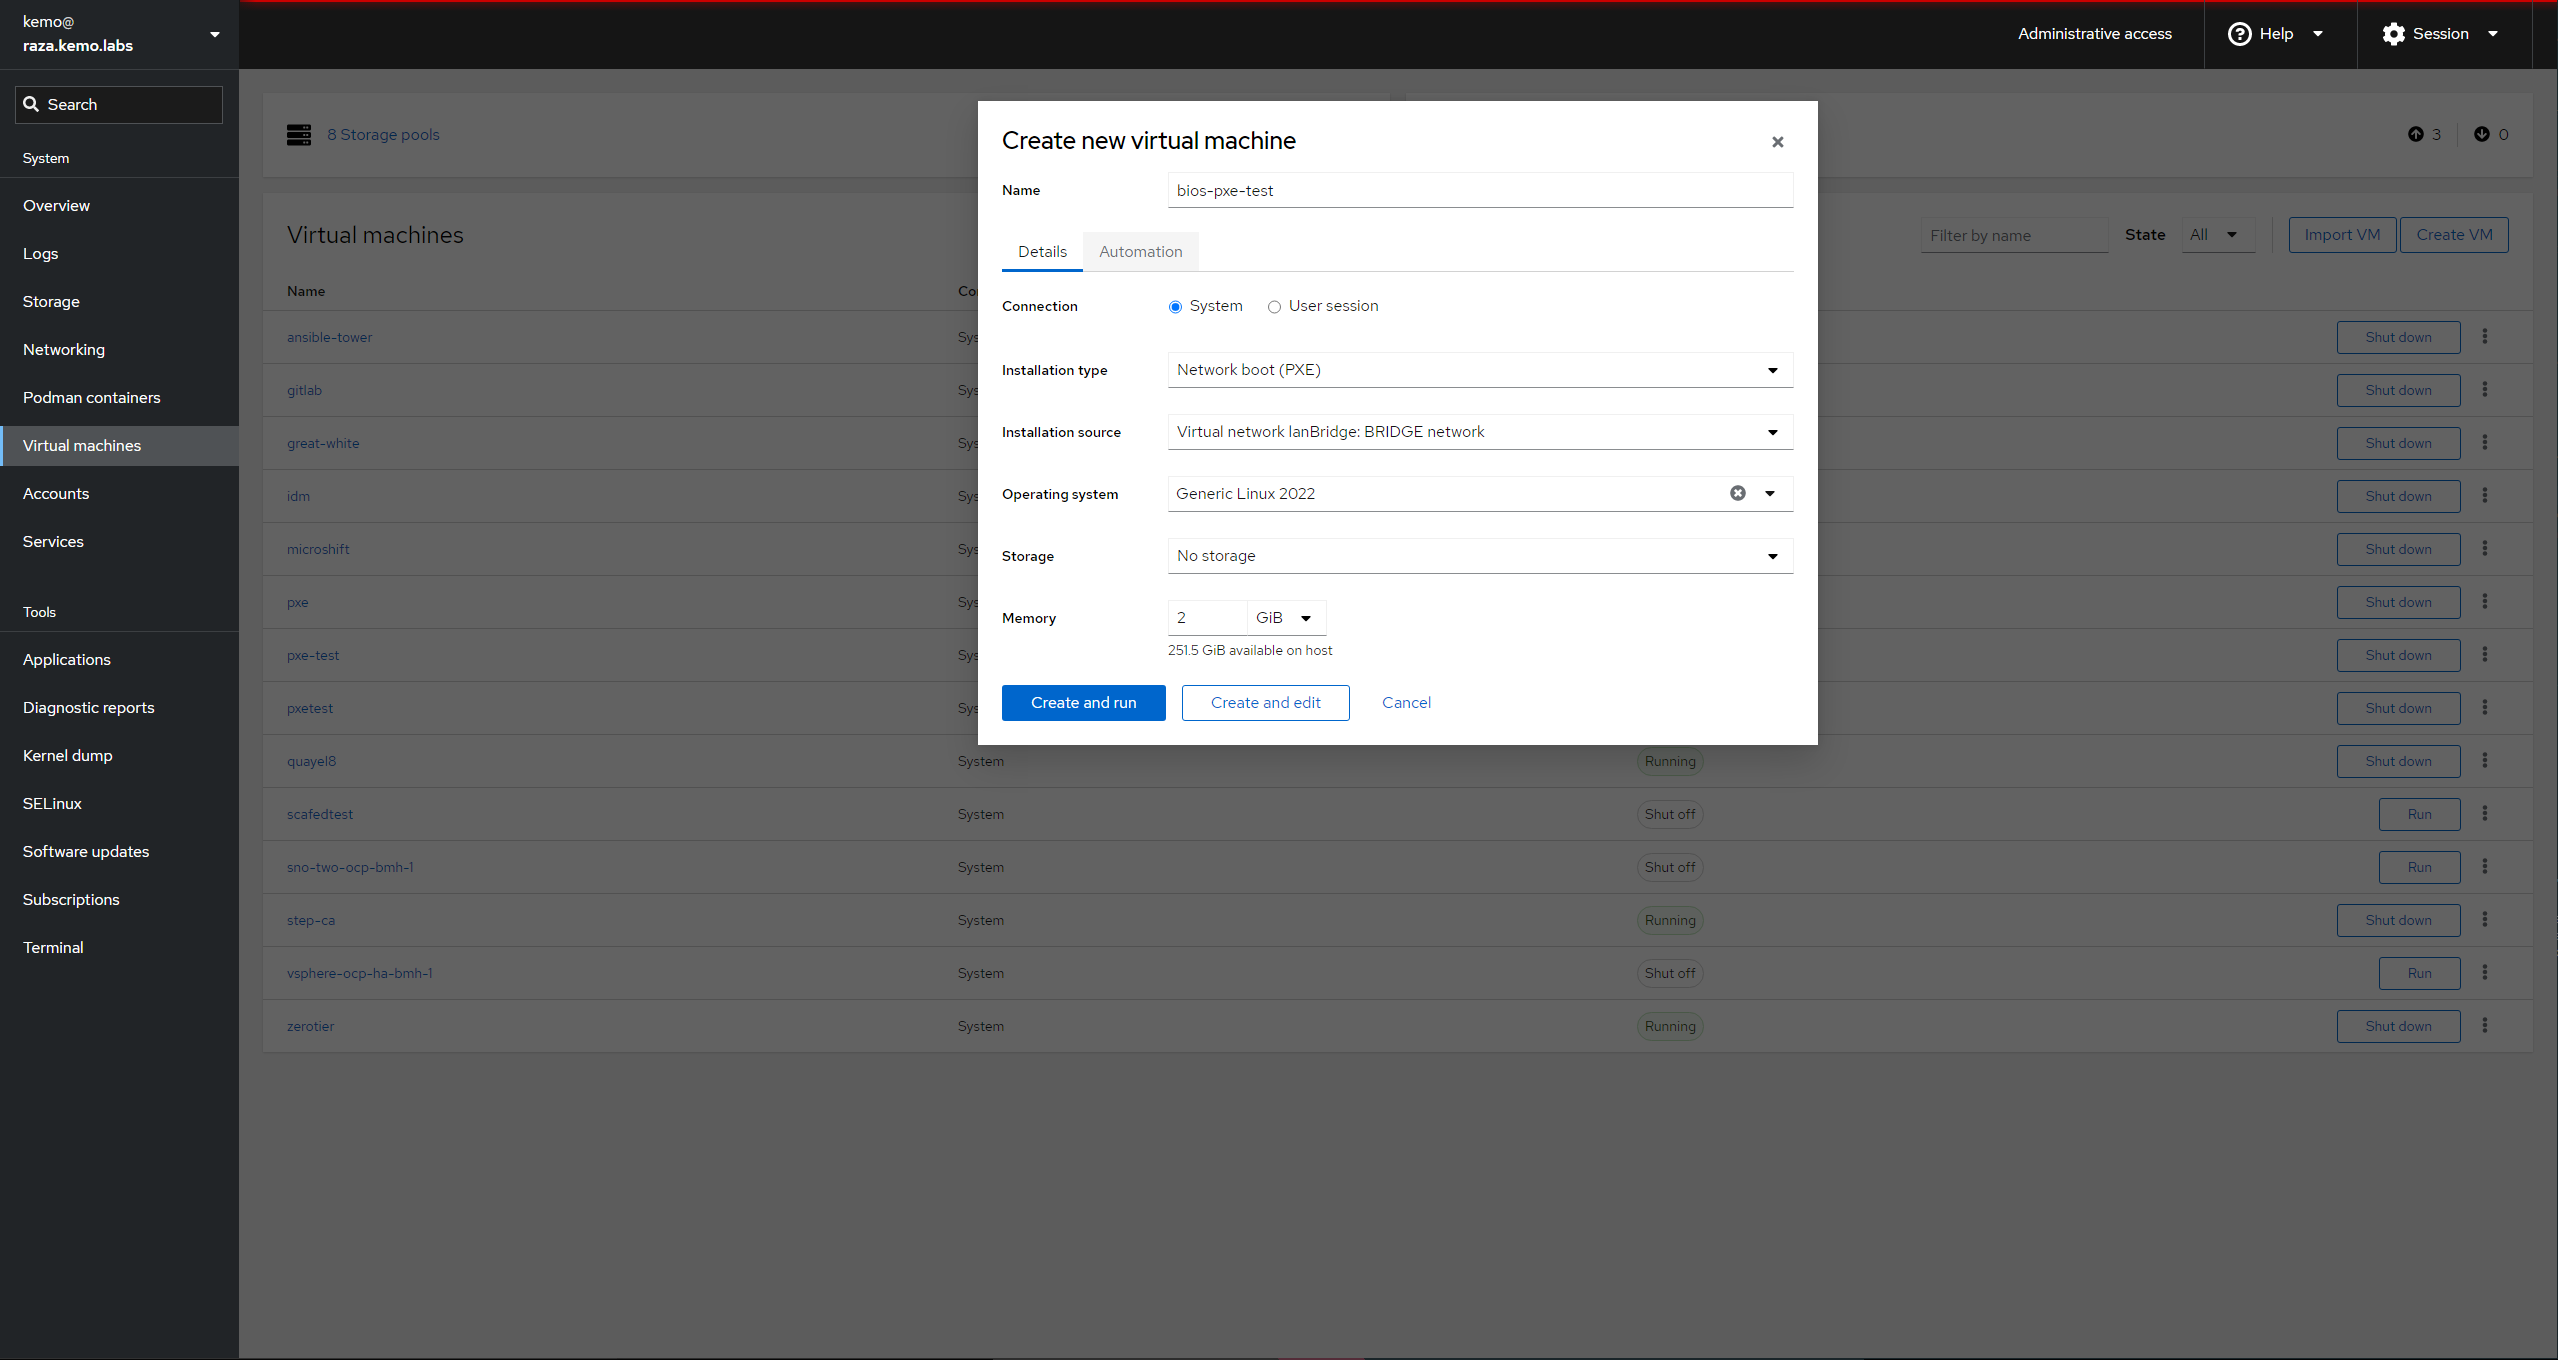

- Give it a Name
- Connection should be system
- Set Installation type to Network boot (PXE)
- Select your hypervisor host’s bridged LAN interface for the Installation Source
- For Operating System you can select whichever one you want to test to boot, or just Generic Linux 2022
- Don’t worry about storage - this is just a boot test.
- And you’ll probably want at least 2GB of RAM for it to load things into memory
- Click Create and edit - do not automatically start it if you want to change to UEFI or edit other VM settings
- When creating the UEFI test VM, switch the Firmware from BIOS to UEFI BEFORE booting the VM - you can’t change it once the VM has booted.
For the EFI VM, you’ll need to swap from BIOS to EFI before the first boot of the VM. Set the Boot Orders to boot from the Disk first, then the Network - this would be how you’d want it on your actual systems, to boot from the disk if there’s something installed and fail back to the network PXE server if the system hasn’t been provisioned or is forcefully being reprovisioned.
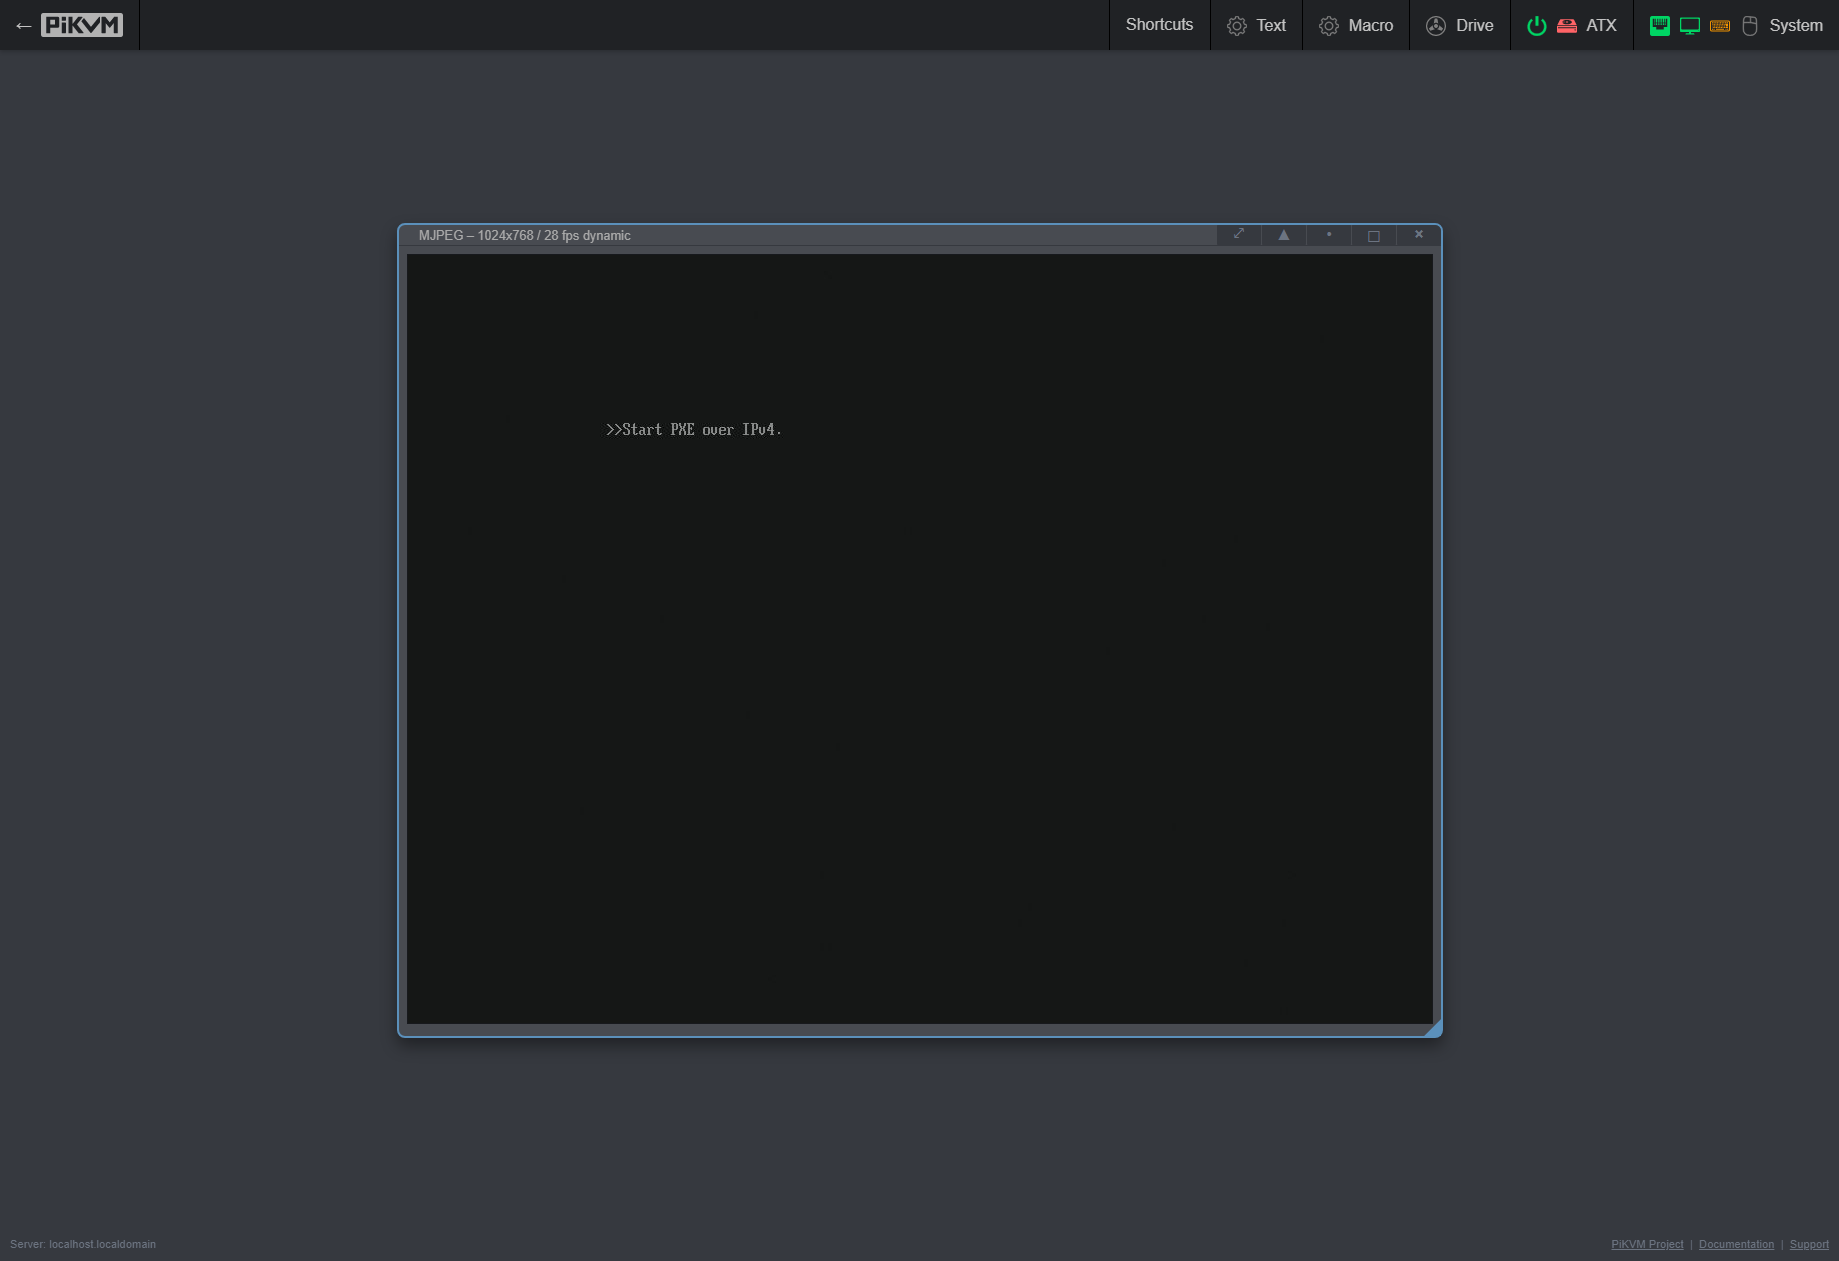
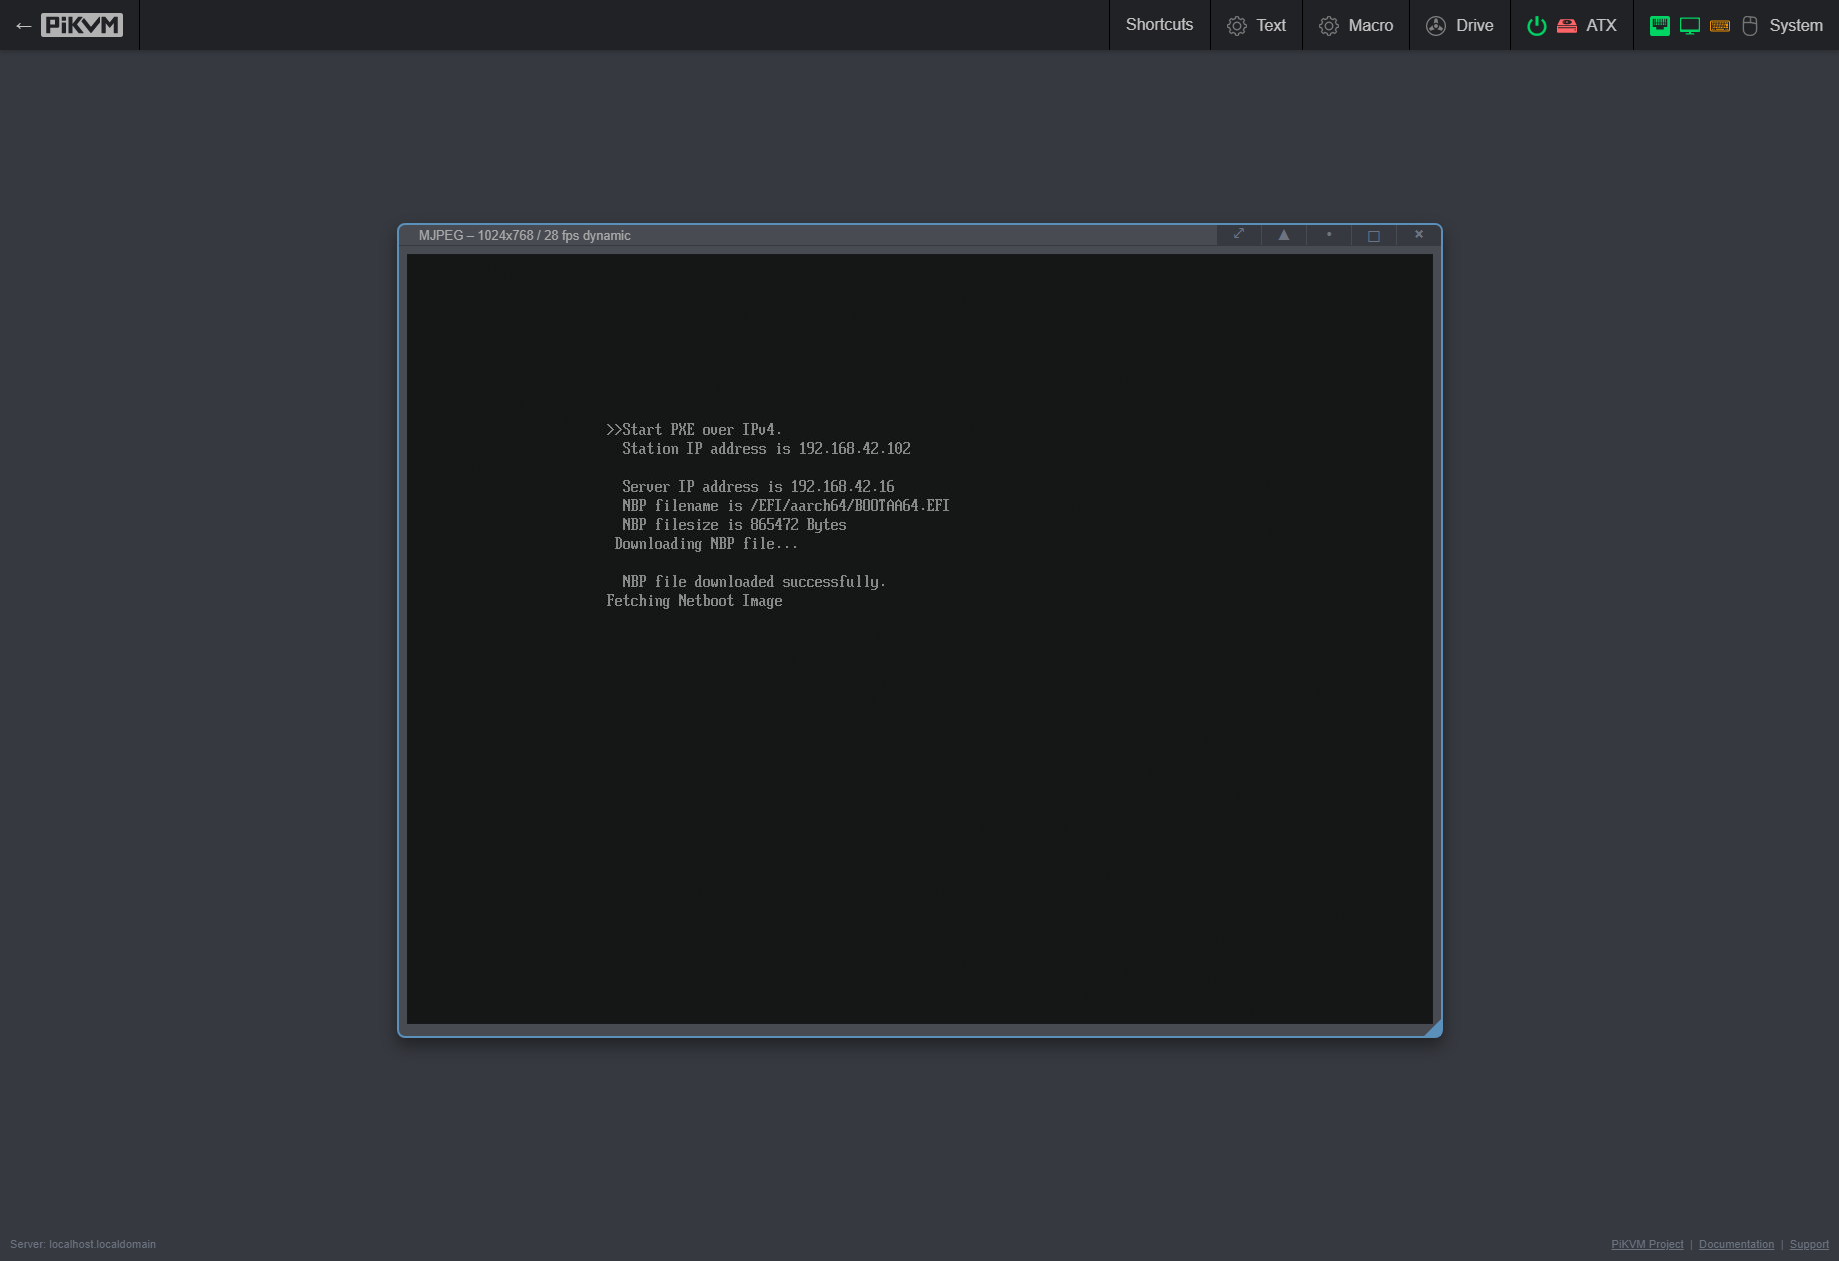
Turn them on and you should be presented with menus similar to the following:
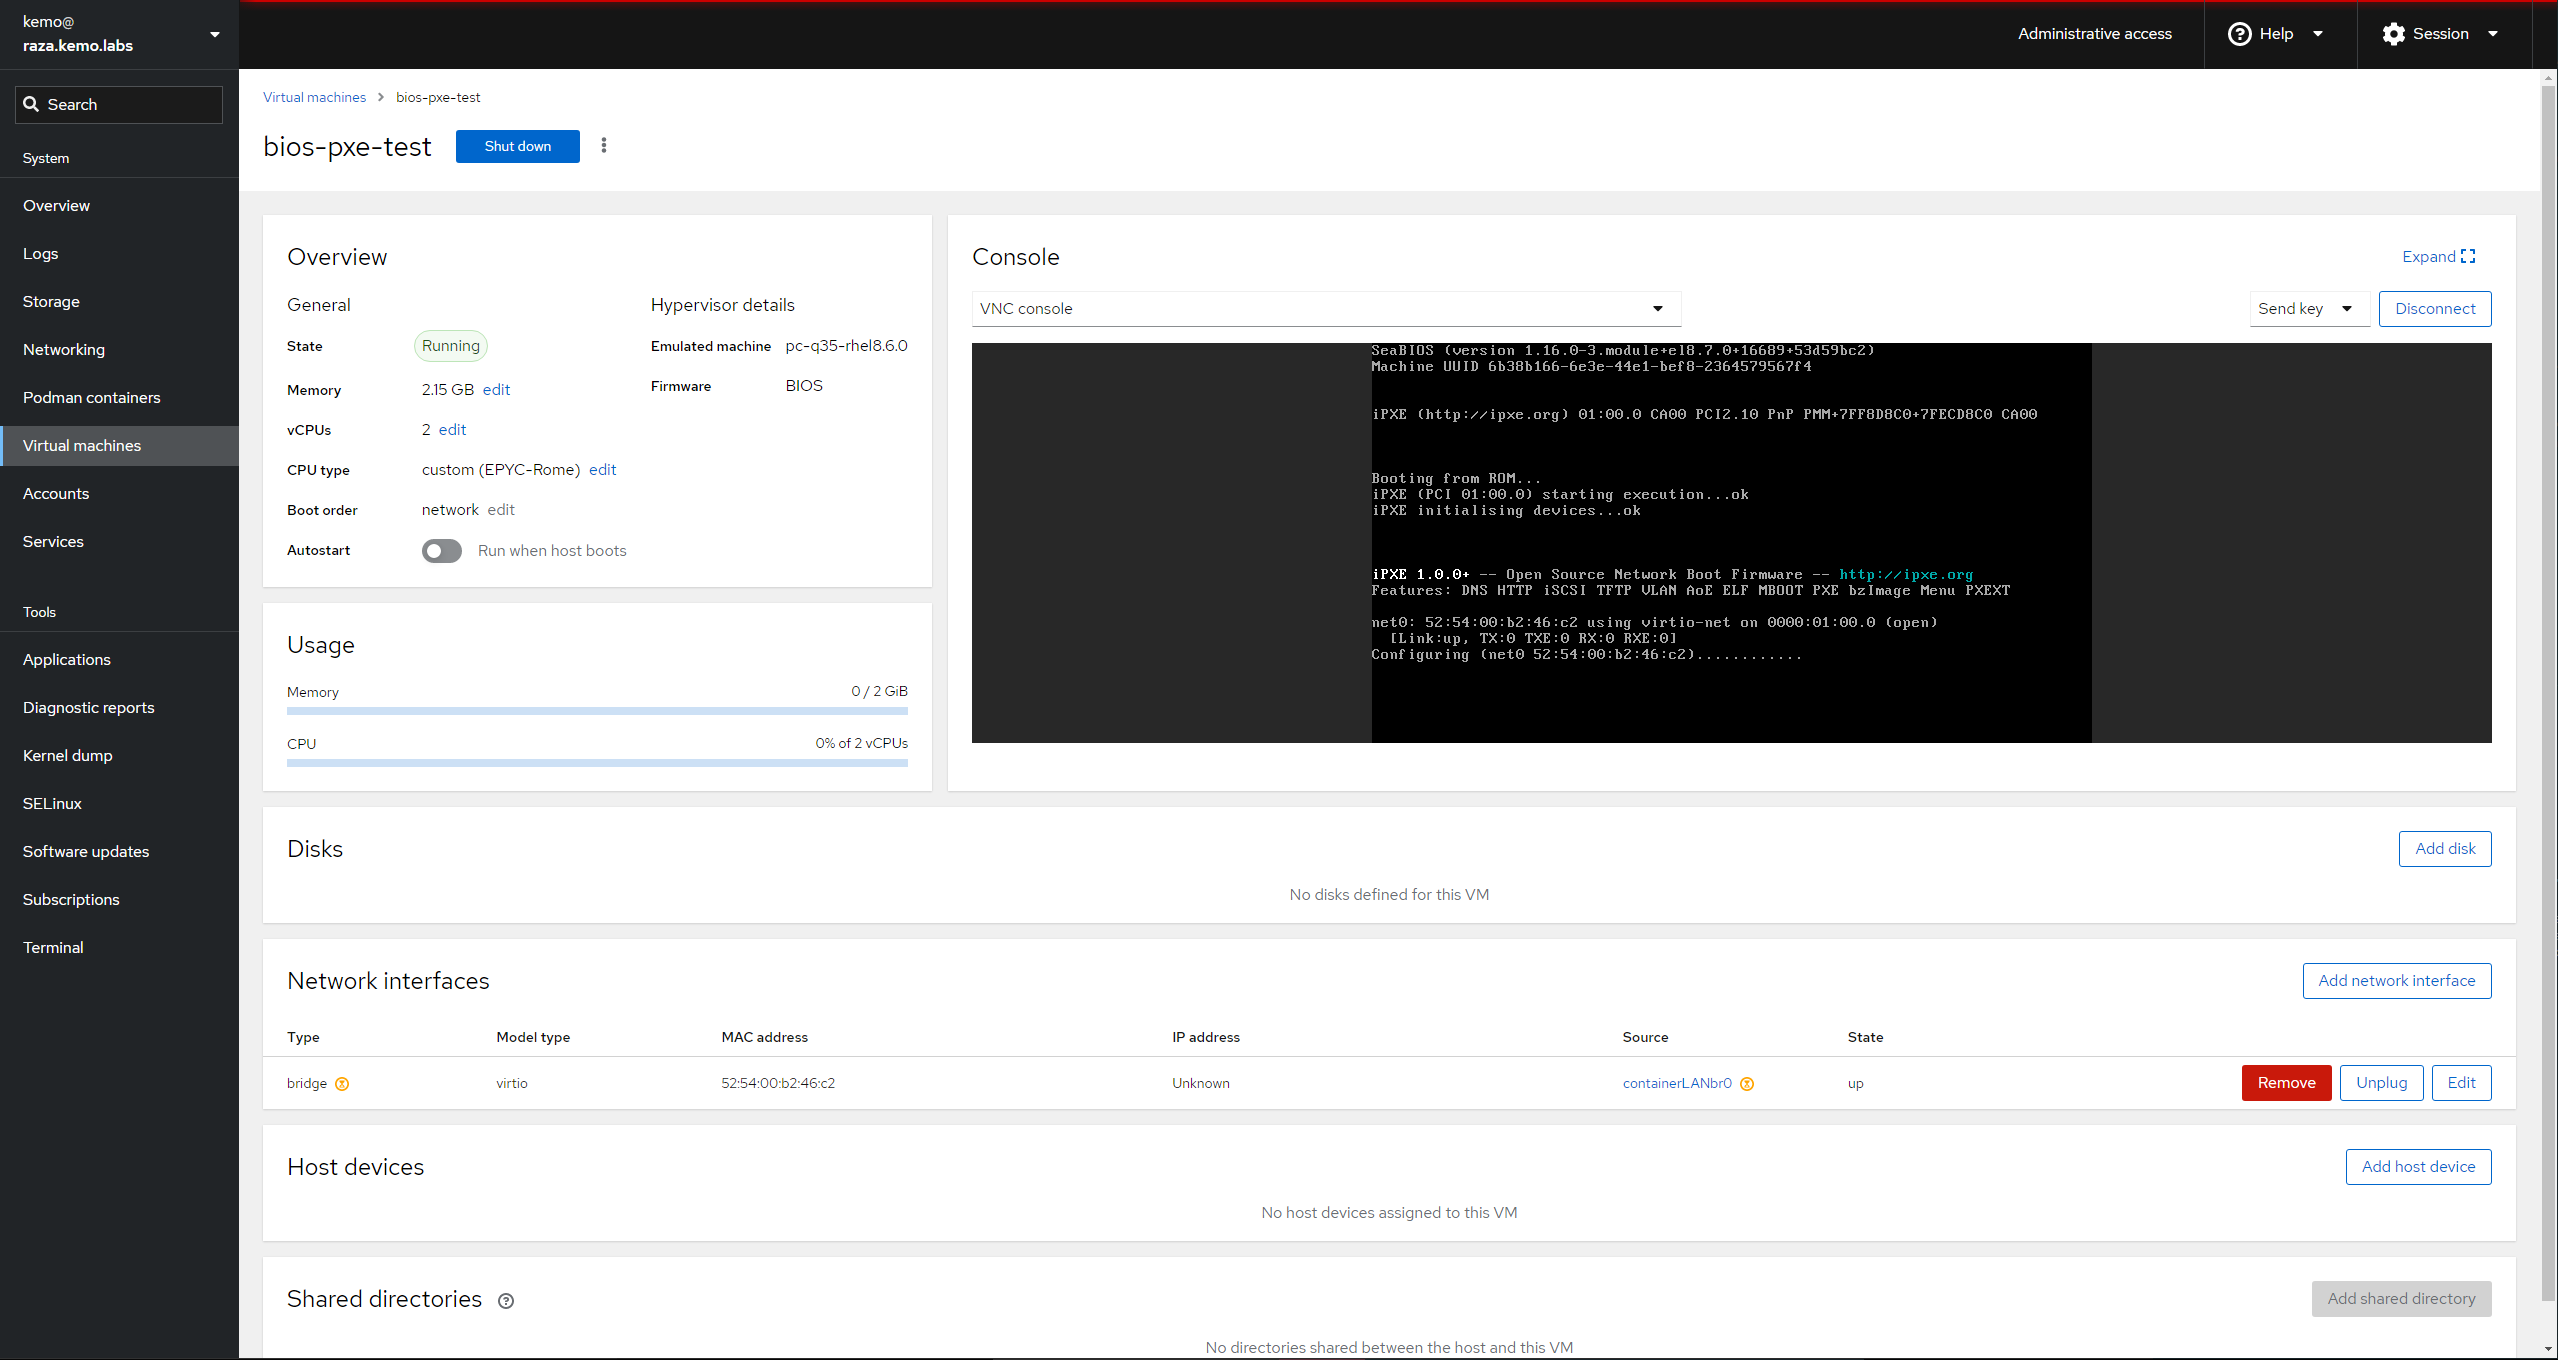

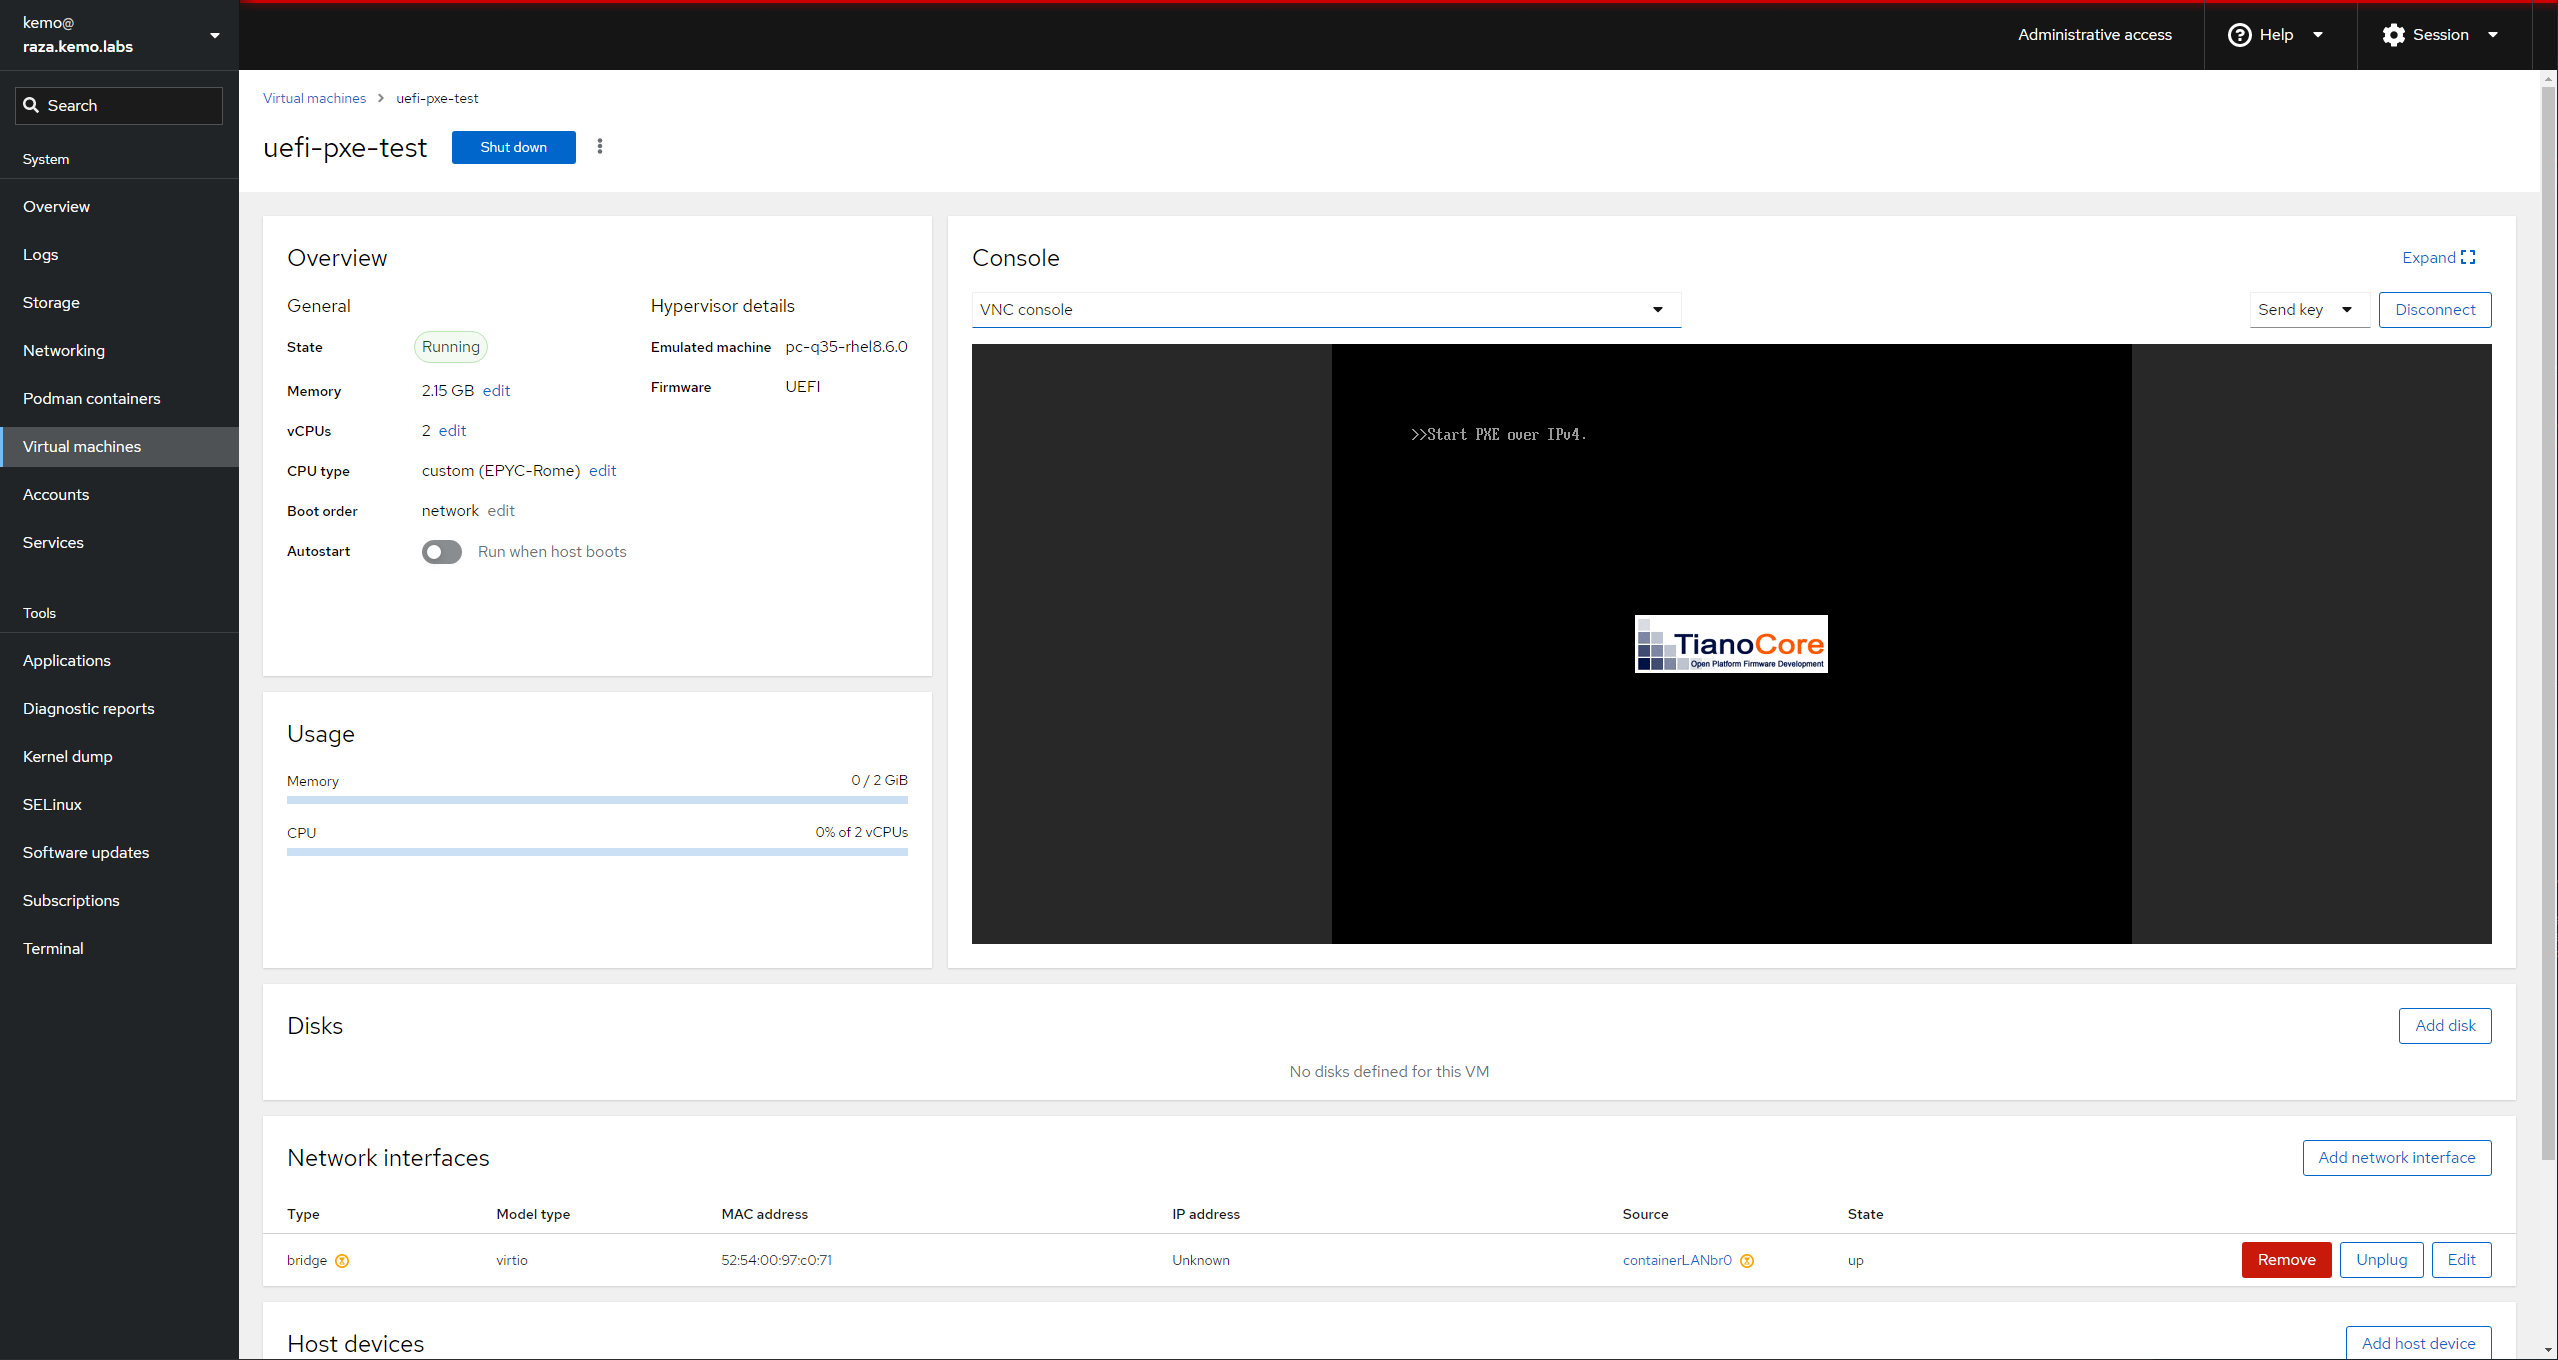
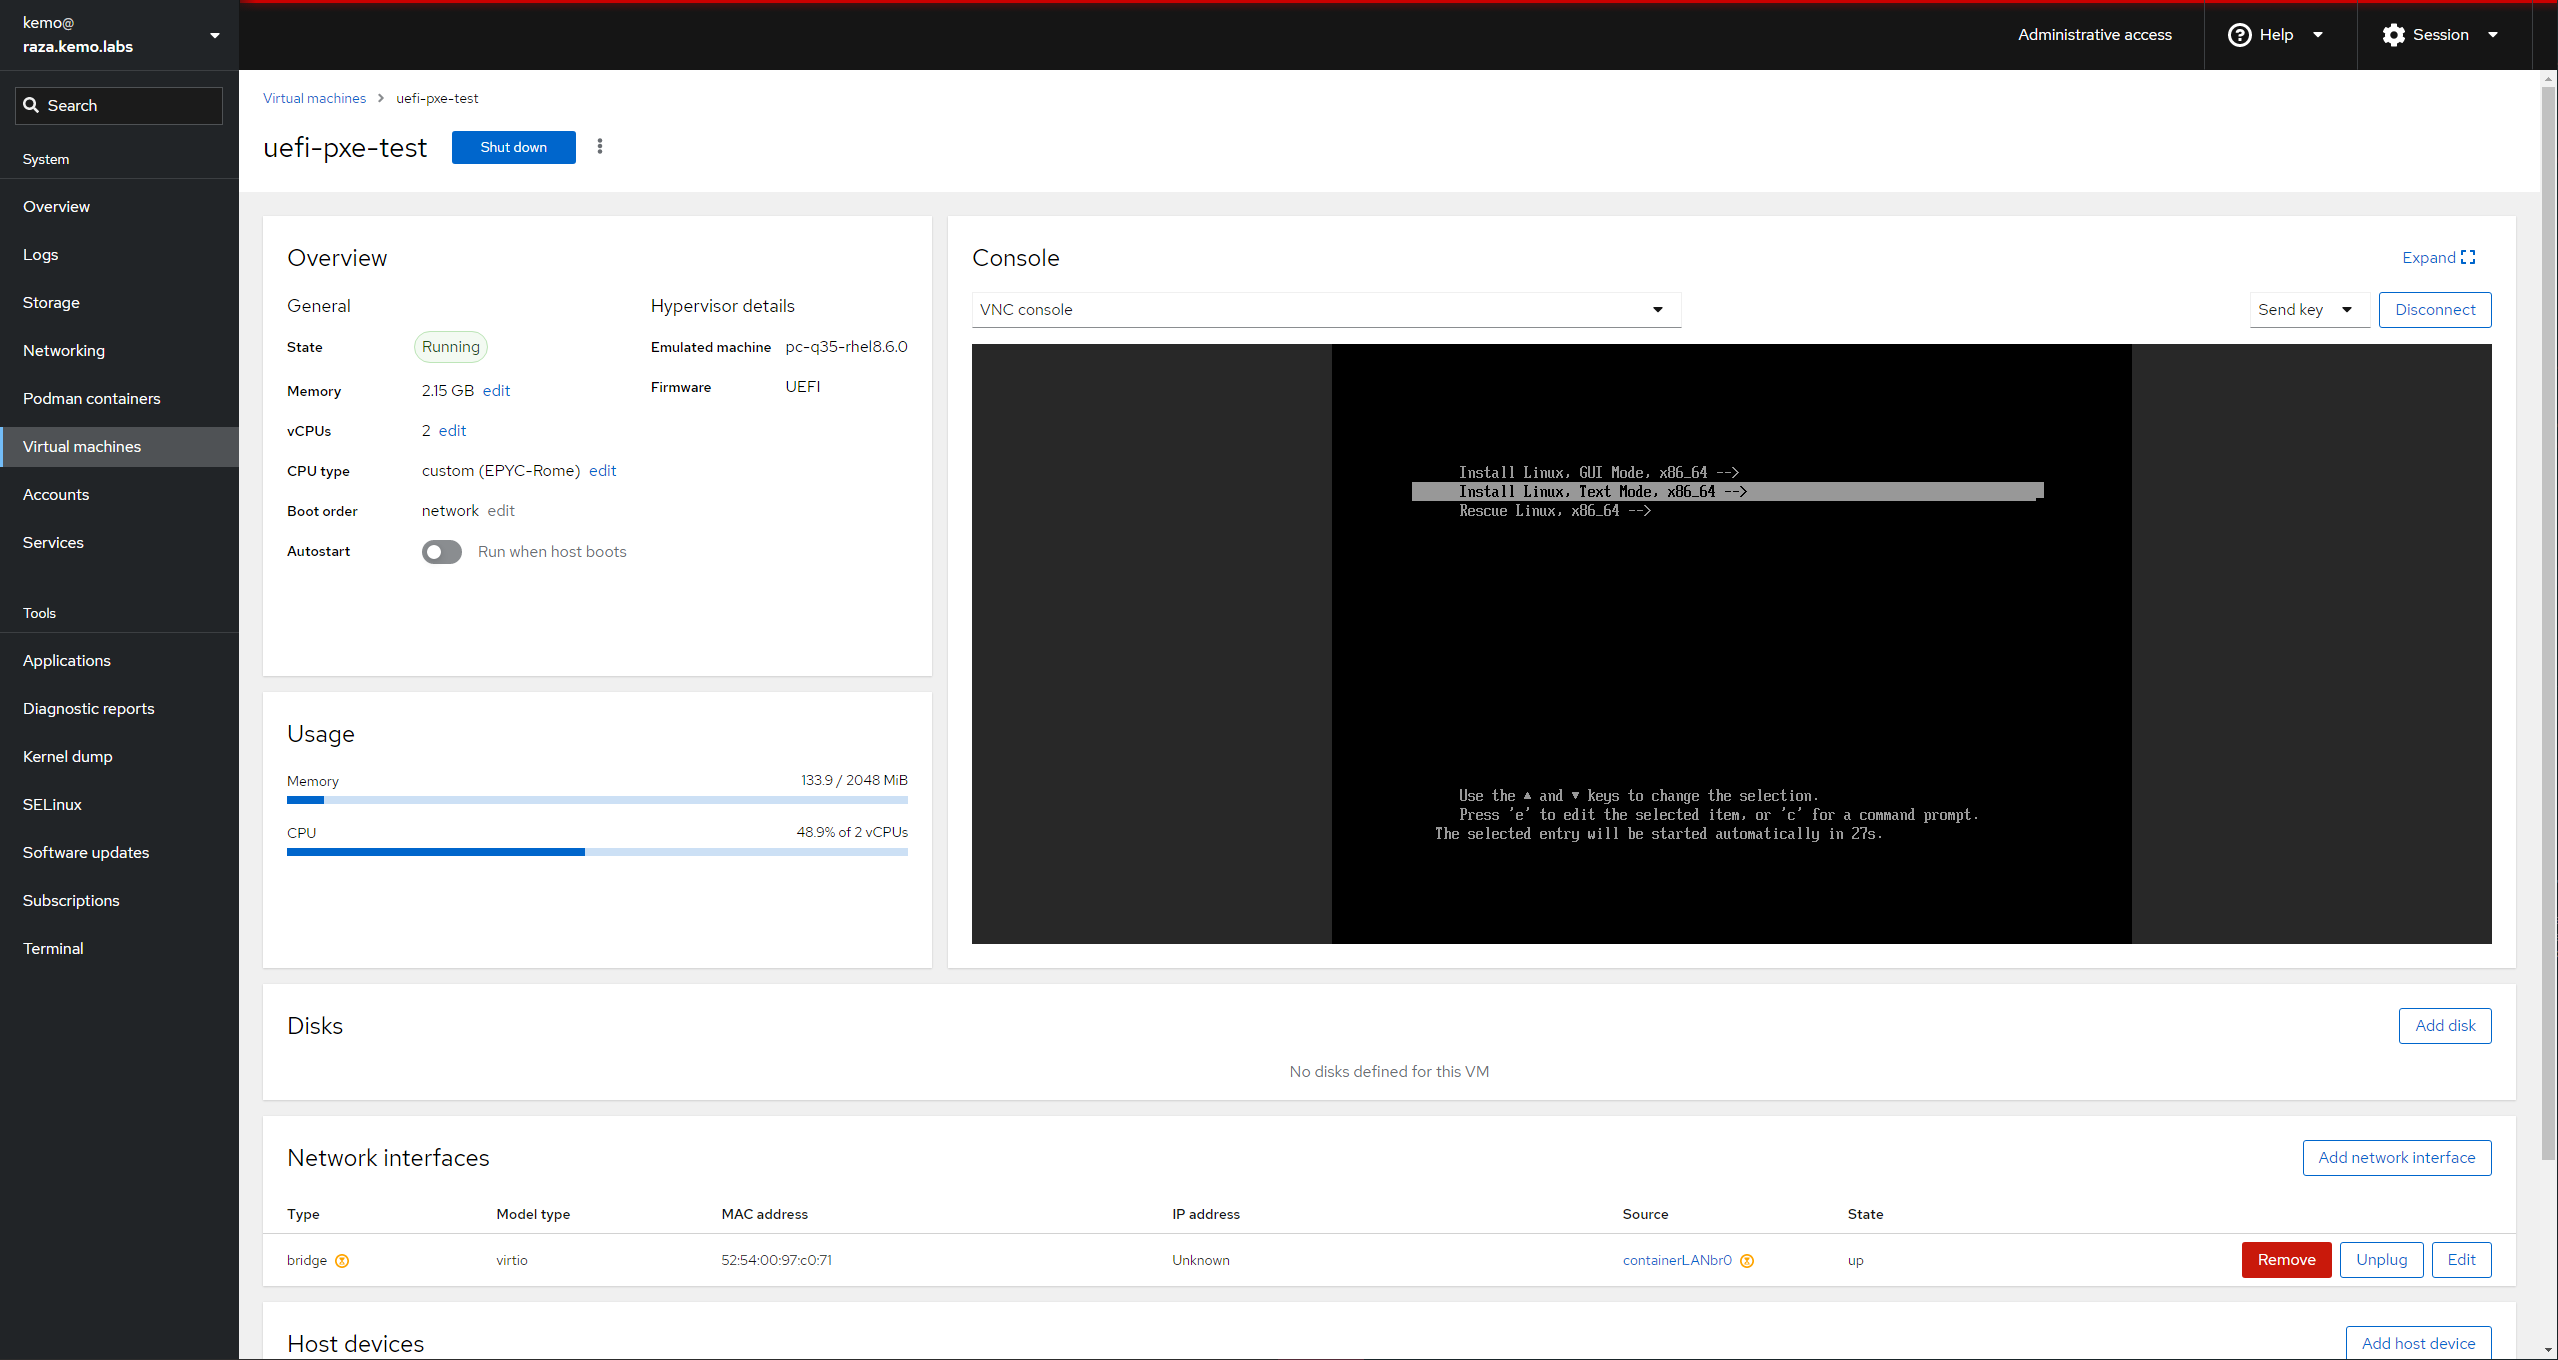
You may have to restart the VM once to get it to boot. IDK why, it just sometimes does dumb things
For ARM64, you could also emulate that with Libvirt/QEMU, but what’s more fun is testing with the real metal…

Next Steps
That’s really about it - maintain that list of distros, keep the server updated, and enjoy the network bootable goodness!
For bonus points, you could provide a Kickstart file along with the menu options with the inst.ks=https://url/to/ks.cfg arguement and automate the full deployment of a system over the network and just end up with a log in prompt with a few keystrokes.
Maybe I’ll just add that functionality to the automation, map the distro list to a list of machines and their configuration to automatically generate Kickstart files and populate the menu option with them…

