Dear Dog, how is it that I get to work on so many cursed things…
So in a twist that no one could have seen, I’ve been playing with another hypervisor lately: Nutanix’s.
Not in my lab, not for real or any workloads I care about of course - that all runs on KVM/Libvirt/Podman on my RHEL systems.
No, I just happen to be marrying someone who used to work at Nutanix so now that curse is cast upon me as well - what wonderful matrimony!
She planted the idea of deploying “Red Hat” “on” “Nutanix” and well…I had to set out to show what that was like since imaginations can run astray. So now I’m here, deploying Nutanix on a single-node Dell R720, in order to deploy Red Hat’s OpenShift.
Before I can get to the OpenShift part of things, I have to get this Nutanix thing licked. Here are some of my findings that may help you get up to speed faster.
Questions!
-
How much does Nutanix cost?
Good question, but something I don’t care about! They have a Community Edition distribution of the Nutanix stack that works well enough for my purposes in this lab. If you really want to know the price then yeah, I got a guy who can get you that info. They’re cheaper than VMWare, I can tell you that much…
-
What do you need to get a copy?
Well, you have to sign up for a Nutanix Next account which is…agreeable, I suppose.
What’s baffling is that they distribute the Community Edition via their forums like people did warez on phpBB and nulled vBulletin a decade ago. Once you have signed up for a Nutanix Next account and promptly added the
*@nutanix.comdomain to your spam filter, you can access this STICKIED. FUCKING. FORUM. FUCKING. POST. https://next.nutanix.com/discussion-forum-14/download-community-edition-38417Look, admittedly, their strength isn’t in creating online platforms with good user experiences, it’s in developing proprietery technology out of Open-Source Software!
-
What sort of hardware do you need?
You could do nested virtualization, if your system and hypervisor support it - you can read how to do it here nested in VMWare Workstation 15: https://gist.github.com/kenmoini/dbf64994d79b763e218c22c904a255b8
If deploying on bare-metal like Dog intended, then you’ll need at least 3 physical disks to support the installation - there’s a disk for the hypervisor, one for the CVM which is like a controller that runs on every node, and one for the data disk where VMs are stored. Also, the CVM requires an SSD/NVMe type disk, though ideally everything would be solid state in a perfect world.
You’ll need at least 20GB of RAM for the CVM, hypervisor takes another 16GB, so keep that in mind when sizing your environment and VMs.
Also, make sure to boot into BIOS mode because Nutanix is based on CentOS 7 and still doesn’t support UEFI fully lol.
-
Why are you like this?
We don’t have enough time for that one, let’s get to installing!
Installation Media
Once you’ve created your Nutanix Next account and downloaded the Installer ISO from that silly stuck forum post, you can move onto creating the installation media.
Most often, you’ll want to burn it to a disk or a USB drive. At first, I just threw the ISO onto my Ventoy USB drive that houses all my other bootable ISOs.
The installer kept failing looking for something called “PHOENIX” - come to find out, that’s the name of the installation media when burning the ISO to a disk, and if you change it or the volume label isn’t applied to the mounted media then the Nutanix AOS installation fails before it can even start!
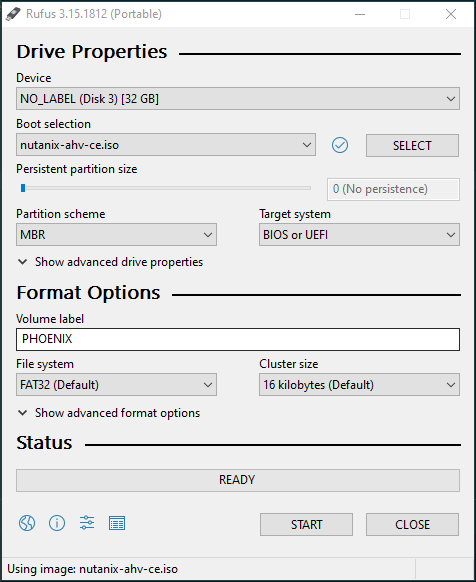
So to install I suggest a dedicated USB drive, a cheap/small 16GB disk will work - I etch it with Rufus Portable, just make sure not to change the assumed Volume Label from “PHOENIX”, ya know, like it’s fucking Knoppix in 2001. The last time I had to deal with install media targeting itself with hard-coded volume labels was when the Twin Towers were still a thing.

Boot Mode
As mentioned before, make sure to boot in BIOS mode because…well, you shouldn’t be surprised at this point. Also, if it’s not obvious, make sure you have Virtualization enabled in the BIOS.
Installation Disks
So as mentioned, there are at least 3 disks needed - if you’re using SSDs behind a Dell PERC just know that they won’t show up as SSDs so you’ll need an SSD attached directly via SATA or something.
Network Requirements
Something else to mention is that you’ll need 4 Static IPs, one for the hypervisor host itself, one for the CVM, one for the Cluster VIP, and one for the Data Services.
Setting up the node
Once you have the installation kicked off (which can be tedious to stumble through debugging their Python scripts…), then your system should reboot into the hypervisor and you’ll be presented a log in prompt.
You’re at the Nutanix Acropolis Hypervisor - akin to what VMWare ESXi or a Red Hat Virtualization Host would be. Log into the hypervisor (maybe via SSH) with the username of root and password of nutanix/4u
Connect to the CVM
The CVM is the Controller VM or something, I dunno, I just made that up, they’re not really descriptive on that acronym - just that it’s important and required for the function of the Nutanix platform and handles all the orchestration and I/O. It’s pretty much just a scheduler for KVM and a SD-SAN.
Either way, once you have logged into the hypervisor host via root/nutanix/4u, you can SSH over to the CVM as the nutanix user ssh nutanix@CVM_IP_HERE - same password as before, nutanix/4u
Create a Single Node Cluster
Once you’ve logged into the hypervisor host, and then logged into the CVM appliance, you can finally make a cluster and get things running!
Just run an assorted spin on the following commands:
# Create a cluster, redundancy_factor=1 basically means single-node
cluster -s "CVM_IP_HERE" --redundancy_factor=1 create

# Get rid of Google auto-set nameservers maybe if you need
ncli cluster remove-from-name-servers servers="8.8.8.8"
ncli cluster remove-from-name-servers servers="8.8.4.4"

# Set your actual name servers
ncli cluster add-to-name-servers servers="192.168.42.9,192.168.42.10"

# Set some parameters
ncli cluster edit-params new-name="MyCluster"
ncli cluster set-external-ip-address external-ip-address="CLUSTER_VIP_HERE"
ncli cluster edit-params external-data-services-ip-address="DATA_SERVICES_IP_HERE"

# Start the cluster
cluster start
With the cluster created and started, you can finally get out of the terminal and launch Prism, which is the primary WebUI for Nutanix’s stack - think of like vCenter or RHV Manager.
Setting up Prism
With the cluster started, you can launch your browser and navigate to your CVM IP at port 9443: https://CVM_IP_HERE:9440/
The default username/password is admin / nutanix/4u - you’ll need to change that on initial log in. Once changed, you’ll need to reauthenticate because third time’s the charm.
Once you are finally logged in, you’ll find a prompt for the Nutanix NEXT account you created earlier.
Now that you have logged into the Prism admin user, associated your Nutanix NEXT Account, you are finally presented with the Prism Web UI!

Configuring Prism
Before we can go about launching VMs, there’s some configuration that needs to be set.
Cluster Networking
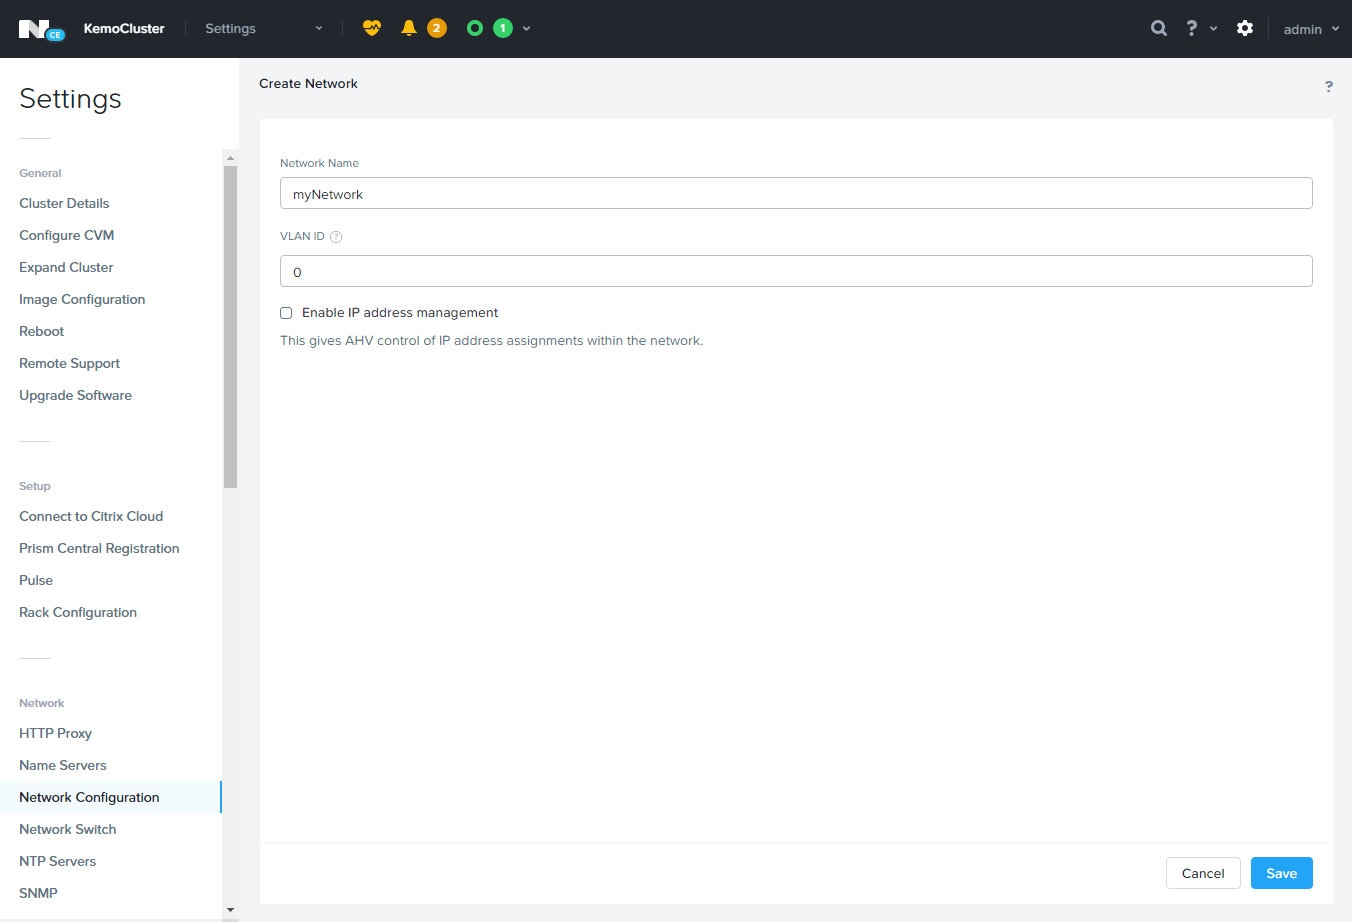
First thing we’ll need to do is create a Network for the VMs to use - click the Cog in the upper right corner to the left of the username dropdown to enter Settings.
In the left-hand pane, navigate to Network > Network Configuration - click the Create Network button.
Give your Network a Name, a VLAN ID (0 being default/none) and click Save.

Storage
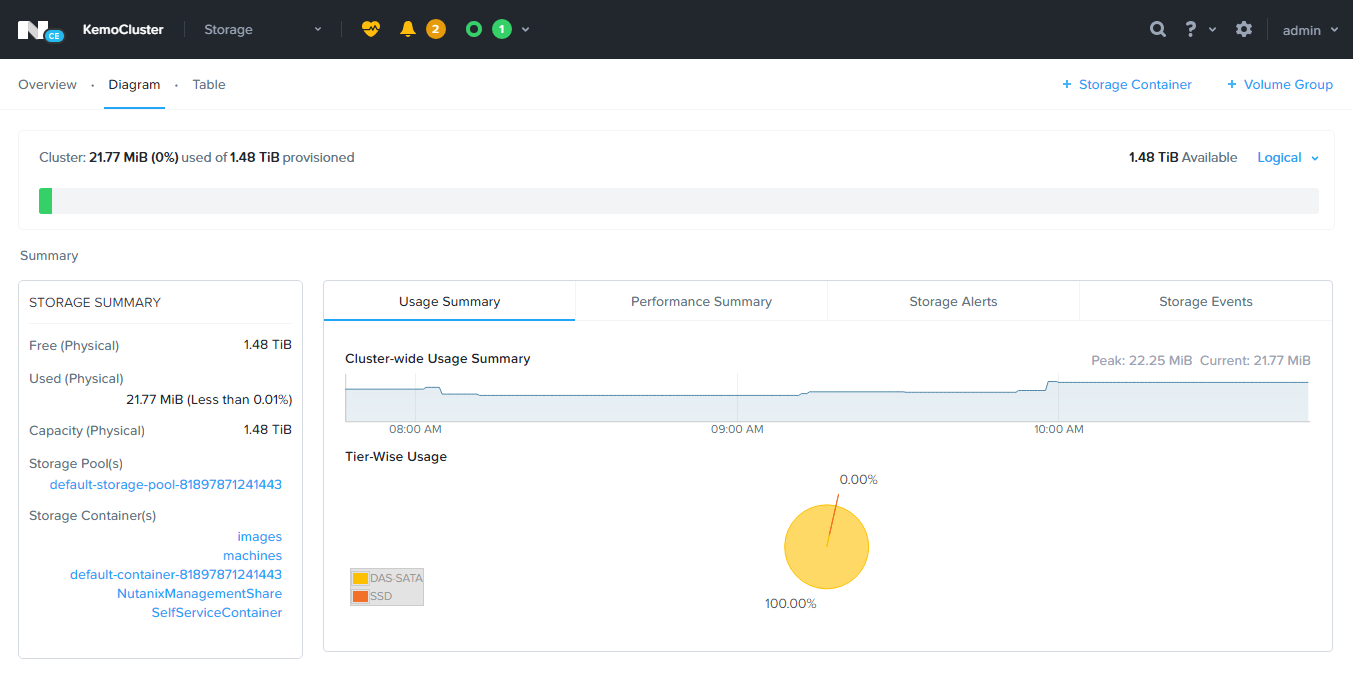
You can choose to create a new Storage Container dedicated to your workloads or other assets - I just create two new Storage Containers, one called images and one called machines in the default Storage Pool. If you had additional disks to attach to the system that were not initialized on install, you’d want to create a new Storage Pool or expand the default one.
To manage the cluster’s storage, you’ll use the dropdown to the right of the Cluster Name in the top bar, select Storage.

Images
You’ll likely want to upload some ISOs to boot new VMs from - to do so, click the Cog in the upper right corner to the left of the username dropdown to enter Settings.
In the left-hand pane, navigate to General > Image Configuration - here you can upload Images or pull them from a URL.
File Server
So an interesting feature Nutanix has is to act as a File Server - this is actually kinda handy I think, you can use the API to upload images or other assets like Kickstart configs and have it pull it from the File Server instead of having to set up your own for something like PXE booting.
To setup the cluster’s File Server, you’ll use the dropdown to the right of the Cluster Name in the top bar, select File Server.
Next Steps
That’s about it - from here you can go about creating VMs. Next I’ll be bit-banging the Prism API to automate the deployment of OpenShift on top of it end-to-end with the Nutanix CSI and whatnot.


