

Proxmox LVM Expansion, adding additional disks to your Proxmox host for VM storage. No real story behind this post, just something simple and probably more of a documentation of the process for myself more than anything.
In case you were just CRAVING the story and background behind this…well, I recently got a few new (to me) Dell R710 servers, pretty decked out. Booting Proxmox off of a 128gb USB 3.0 Stick, the internal hard drives were untouched and more importantly, unmounted when booting into Proxmox.
It pays to have an RHCSA…(PV/VG/LV is part of it). In looking for a guides and resources detailing the addition of additional disks to Proxmox, many of them had it set as a mounted ext3 filesystem. I knew this couldn’t be right. A lot of other resources were extremely confusing, and then I realized that Proxmox uses LVM natively so if I recall to my RHCSA training all I need to do is assign the disks as a Physical Volume, add them to the associated Volume Group, and extend the Logical Volume. Then boom, LVM handles the rest of it for me like magic.
I’ve got 2 120gb SSDs in the server waiting to host some VMs so let’s get those disks initialized and added to the LVM pools!
And before you ask, yes that set of 120gb SSDs is in a RAID0. As you can tell, I too like to live dangerously…but seriously they’re SSDs and I’ll probably reformat the whole thing before it could even error out…and yeah I could use RHV Self-Hosted, but honestly, for quick tests in a lab Proxmox is easier for me. This isn’t production after all…geez, G.O.M.D.
Take 1
First thing, load into the Proxmox server terminal, either with the keyboard and mouse or via the Web GUI’s Shell option. You’ll want to be root.
Next, use fdisk -l to see what disk you’ll be attaching, mine looked something like this:
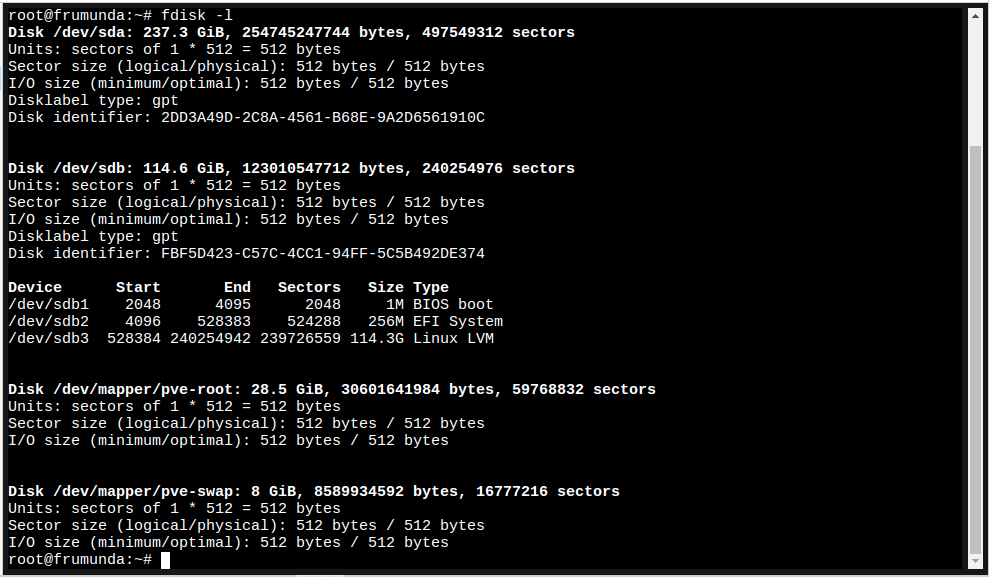
What I’m looking for is that /dev/sda device. Let’s work with that.
Next, we’ll initialize the partition table, let’s use cfdisk for that…
$ cfdisk /dev/sdaNavigate around…
> New -> Primary -> Specify size in MB
> Write
> Quit
Great, next let’s create a Physical Volume from that partition. It’ll ask if you want to wipe, press Y…
$ pvcreate /dev/sda1
Next we’ll extend the pve Volume Group with the new Physical Volume…
$ vgextend pve /dev/sda1We’re almost there, next let’s extend the logical volume for the PVE Data mapper…we’re increasing it by 251.50GB, you can find that size by seeing how much is available with the vgs command
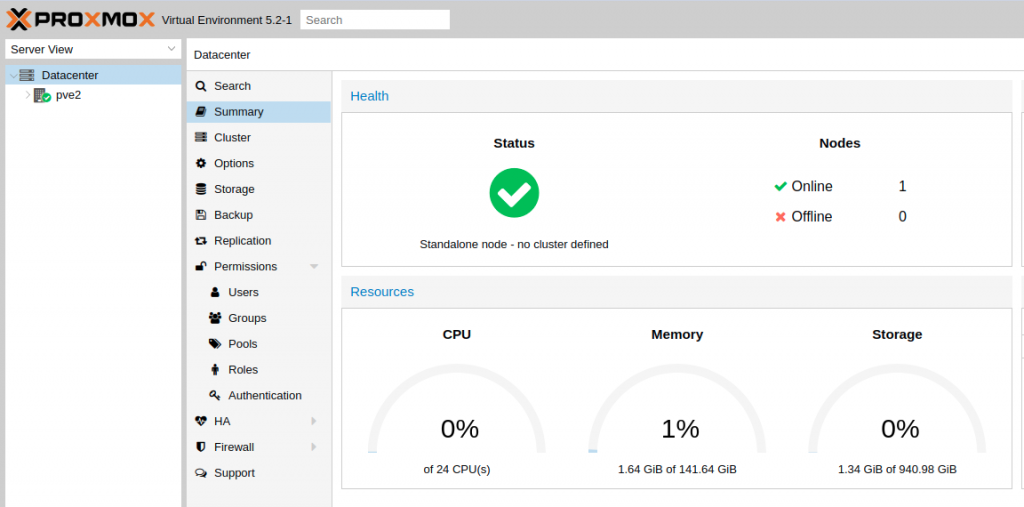
$ lvextend /dev/pve/data -L +251.50gAnd that’s it! now if we jump into Proxmox and check the Storage across the Datacenter we can see it’s increased! Or we can run the command…
$ lvdisplayRinse and Repeat
Now we’re on my next Proxmox node. No, I’m not building a cluster and providing shared storage, at least not at this layer.
My next system is a Dell R710 with Proxmox freshly installed on an internal 128gb USB flash drive. It has two RAID1+1hot-spare arrays that are about 418GB large each, they’re at /dev/sdb and /dev/sdc. Let’s add them really quickly…
$ cfdisk /dev/sdb> GPT
> New -> Primary -> Specify size in MB
> Write
> Quit$ cfdisk /dev/sdc> GPT
> New -> Primary -> Specify size in MB
> Write
> Quit$ pvcreate /dev/sdb1 && pvcreate /dev/sdc1
$ vgextend pve /dev/sdb1 && vgextend pve /dev/sdc1
$ lvextend /dev/pve/data -L +851.49gAnd now we should have just about a terabyte of storage available to load VMs into…
Huzzah! It worked! Plenty of room for our VMs to roam around now.
What am I gonna do with a few redundant TBs of VM storage and about half a TB in available RAM and more compute than makes sense? Continue along my Disconnected DevSecOps lab challenge of course. You might remember some software defined networking services being tested on a Raspberry Pi Cluster…
More soon to come…

