

Giving a new meaning to mobile homes
I’ve been running a Red Hat Identity Management (FreeIPA) server for a while now and it provides my lab with LDAP authentication and authorization. Though something was missing - a home directory that moved with me across my servers. On each server I logged into I’d have a separate home directory with different files and worse - different settings.
Most guides will have you setting up an NFS server on the same LDAP server, however I have a QNAP NAS that has plenty of space and exposes NFS so I set out to integrate these two platforms so that when I logged into a server, I’d get the same home server automatically mounted from the QNAP NAS.
Installing Red Hat Identity Management
In case you don’t already have IDM/FreeIPA installed, here’s a little cheat-sheet:
- Create a RHEL VM, give it 4GB of RAM, 2 vCPUs, and 40GB of disk space.
- Set it with a hostname, something like
idm.example.com - Give it a static IP as well the following DNS records for the different services:
A:
  - name: idm.example.com
    value: 1.2.3.4
    ttl: 6400

SRV:
  - name: _kerberos._udp
    value: idm.example.com.
    port: 88
    priority: 0
    ttl: 6400
    weight: 100
  - name: _kerberos._tcp
    value: idm.example.com.
    port: 88
    priority: 0
    ttl: 6400
    weight: 100

  - name: _kerberos-master._udp
    value: idm.example.com.
    port: 88
    priority: 0
    ttl: 6400
    weight: 100
  - name: _kerberos-master._tcp
    value: idm.example.com.
    port: 88
    priority: 0
    ttl: 6400
    weight: 100

  - name: _kpasswd._udp
    value: idm.example.com.
    port: 464
    priority: 0
    ttl: 6400
    weight: 100
  - name: _kpasswd._tcp
    value: idm.example.com.
    port: 464
    priority: 0
    ttl: 6400
    weight: 100

  - name: _ldap._tcp
    value: idm.example.com.
    port: 389
    priority: 0
    ttl: 6400
    weight: 100
  - name: _ldaps._tcp
    value: idm.example.com.
    port: 636
    priority: 0
    ttl: 6400
    weight: 100

TXT:
  - name: _kerberos
    ttl: 6400
    value: "EXAMPLE.COM"
By the way, that YAML structure representing the DNS records can actually be dropped right into a Go-Zones configuration file, which will also automatically create the reverse IP PTR record from the defined A record.
With the networking in place you can go ahead and install IDM:
## Register the system wit Subscription Manager
subscription-manager register

## Attach a subscription
subscription-manager attach

## Enable the needed repos
subscription-manager repos --enable=rhel-8-for-x86_64-baseos-rpms
subscription-manager repos --enable=rhel-8-for-x86_64-appstream-rpms

## Update base packages
dnf update -y

## Reboot since there was probably a new kernel downloaded
systemctl reboot

## Add an entry to the /etc/hosts file for this VM
echo "1.2.3.4 idm.example.com idm" >> /etc/hosts

## Enable the stream module for IDM, sync to RPMs, and install the server module
yum module enable idm:DL1
yum distro-sync
yum module install idm:DL1/server

## Install the needed packages
dnf install -y nano cockpit firewalld python3-libselinux bind bind-dyndb-ldap ipa-server openldap-devel platform-python-devel ipa-server-common ipa-server-dns ipa-server-trust-ad krb5-devel python36-devel python3-ipapython python3-six python3-dns python3-cffi python3-idna python3-netaddr python3-gssapi python3-decorator python3-pyasn1 python3-jwcrypto python3-pyOpenSSL python3-cryptography python3-pytest python3-ldap python3-argcomplete python3-argh "@Development tools"

## Install needed Pip modules
python3 -m pip install --upgrade custodia ipapython==4.8.7 jwcrypto pyasn1-modules pyopenssl python-ldap paramiko cryptography pytest argparse-manpage

## Enable Firewalld
systemctl enable --now firewalld

## [Optional] Enable Cockpit
systemctl enable --now cockpit.socket

## Open the needed Firewall ports
firewall-cmd --add-service=cockpit --permanent
firewall-cmd --add-service=dns --permanent
firewall-cmd --add-service=freeipa-ldap --permanent
firewall-cmd --add-service=freeipa-ldaps --permanent
firewall-cmd --add-service=http --permanent
firewall-cmd --add-service=https --permanent
firewall-cmd --add-service=ssh --permanent
firewall-cmd --add-port=88/tcp --permanent
firewall-cmd --add-port=88/udp --permanent
firewall-cmd --add-port=464/tcp --permanent
firewall-cmd --add-port=464/udp --permanent
firewall-cmd --add-port=8080/tcp --permanent

## Reload the firewall
firewall-cmd --reload

## Set the umask for the install
umask 0022

## Run the IDM Install
ipa-server-install --unattended \
  --realm=EXAMPLE.COM \
  --domain=example.com \
  --hostname=idm.example.com \
  --ds-password=s0m3S3cur3P455 \
  --admin-password=s0m3S3cur3P455 \
  --mkhomedir \
  --no-ntp \
  --no-dns
At this point, you should be able to access the Web UI at https://idm.example.com and can login as admin / s0m3S3cur3P455.
Create a few User Groups, a few Users, maybe some Sudo Rules/Groups/Commands, and you should be good to go. The User Groups are key, otherwise you’d need to set permissions per-user and that can sometimes get tedious.
QNAP Configuration
Before we go about logging in to systems with these LDAP users, we need to configure the QNAP NAS as a client and for NFS.
Add LDAP Authentication to QNAP
The first thing that needs to be done on the QNAP side is enable LDAP authentication - this will allow your RH IDM/FreeIPA users to log into the QNAP NAS.
- Log into the QNAP Web UI as an administrator
- Click on the Control Panel applet, select Domain Security
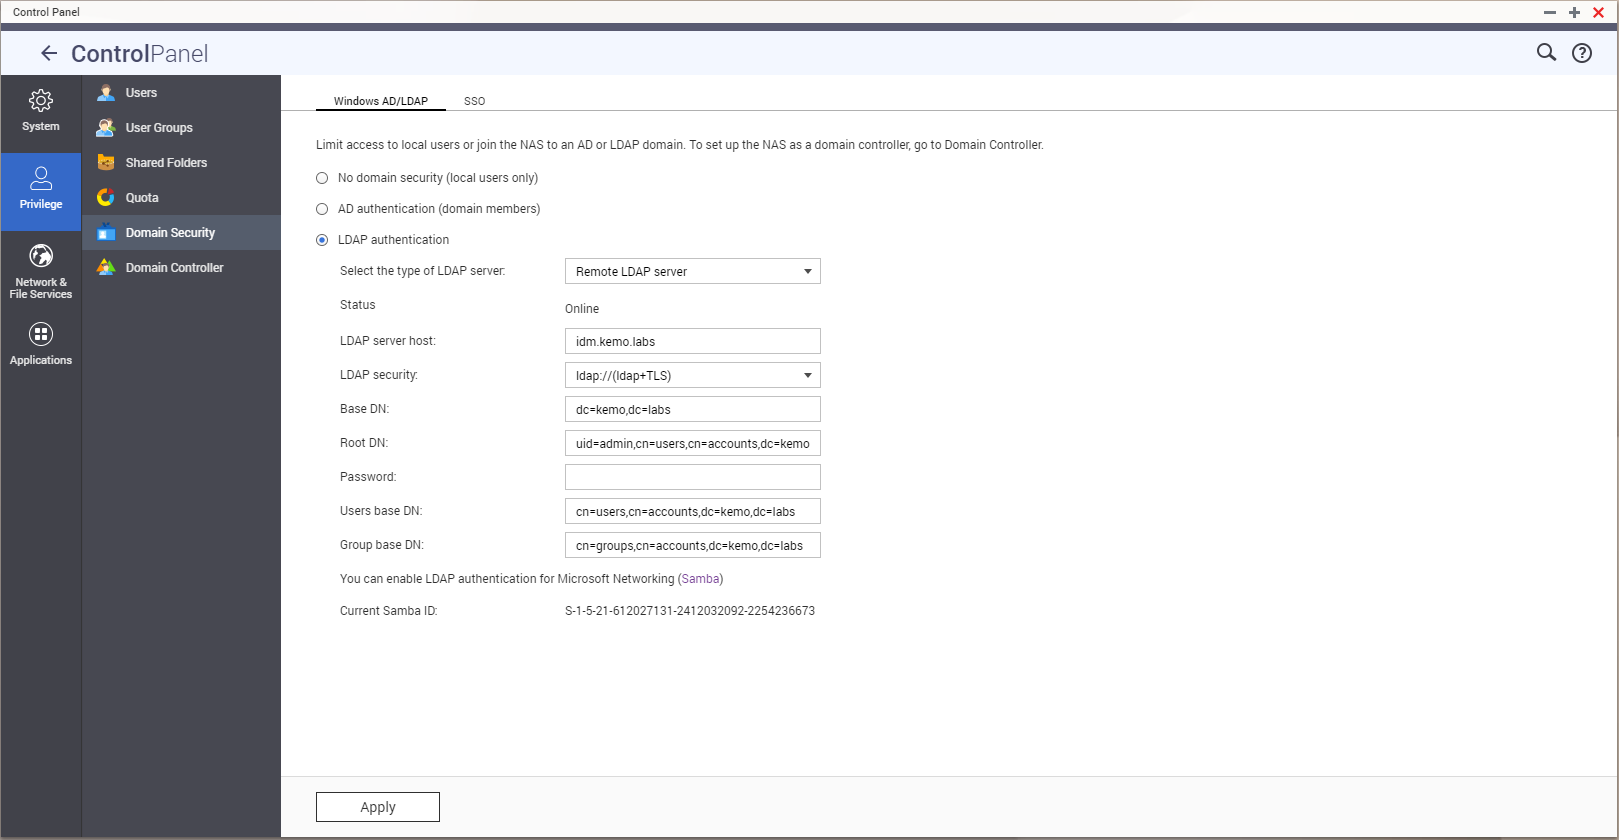
- Select the radio option for LDAP authentication and fill out the boxes with the following, substituting for your own domain values:
- Select the type of LDAP server: Remote LDAP Server
- LDAP server host:
idm.example.com - LDAP security:
ldap://(LDAP+TLS) - Base DN:
dc=example,dc=com - Root DN:
uid=admin,cn=users,cn=accounts,dc=example,dc=com - Password:
s0m3S3cur3P455 - Users base DN:
cn=users,cn=accounts,dc=example,dc=com - Groups base DN:
cn=groups,cn=accounts,dc=example,dc=com - Click Apply
- When prompted, select Use LDAP for Microsoft Networking
It should look something like this…
Enable Home Directories in QNAP
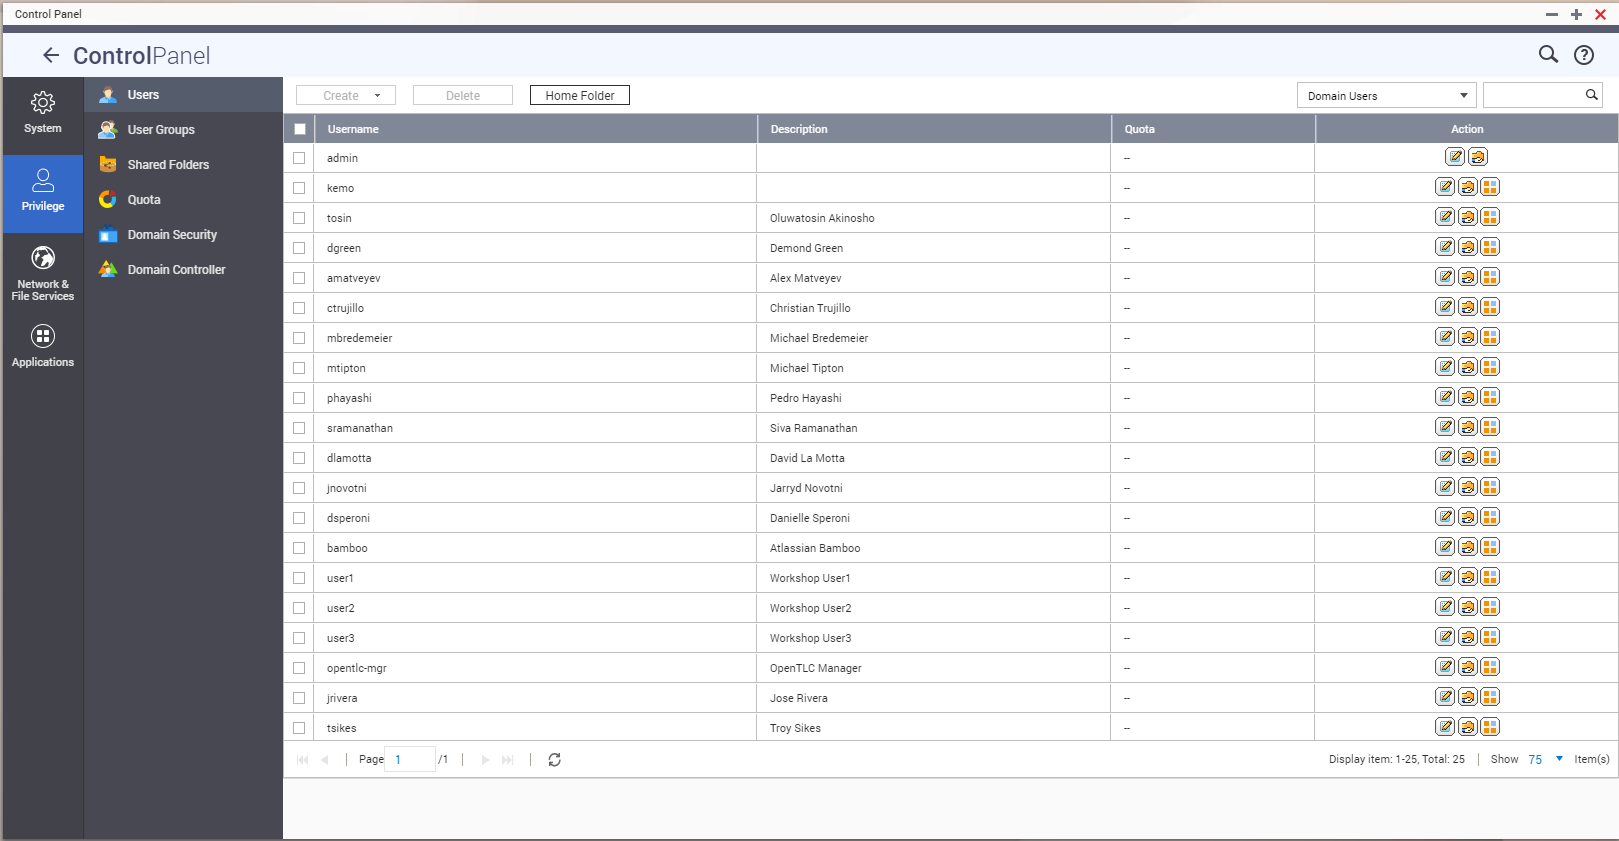
Once the LDAP authentication has been enabled on the QNAP NAS, it will query the server for users and groups and then you can enable Home directories on the NAS for when users log in.
- In the QNAP Web UI, navigate to Control Panel > Privilege > Users.
- Click the dropdown to the right and select Domain Users.
- Click the Home Folder button - select a Storage Pool.
Give User Groups Read/Write Access to Home Directories in QNAP
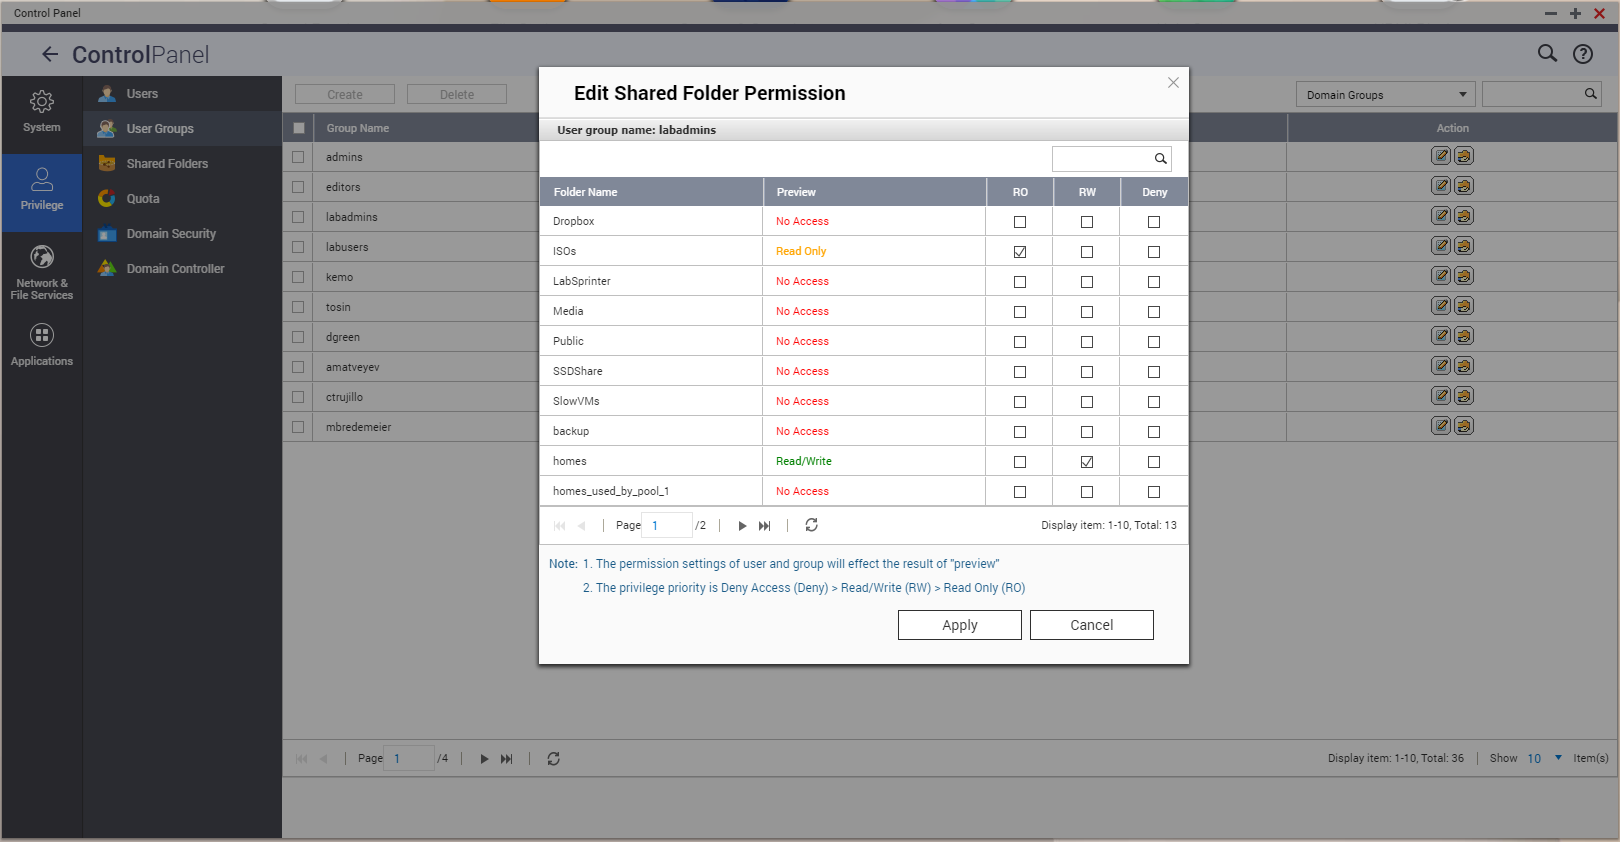
Now when LDAP users log in to the NAS they’ll have home directories created but they’ll still need permission to access the share that the home directory is in.
- Navigate to Control Panel > Privilege > User Groups.
- Click the dropdown to the right and select Domain Users.
- Click the Edit Shared Folder Permission button in the Actions column to the right of a group and give R/W access to the homes shared folder - you can also give access to any other store you’d like that group to have access to.
Set QNAP NFS Host Access Rules
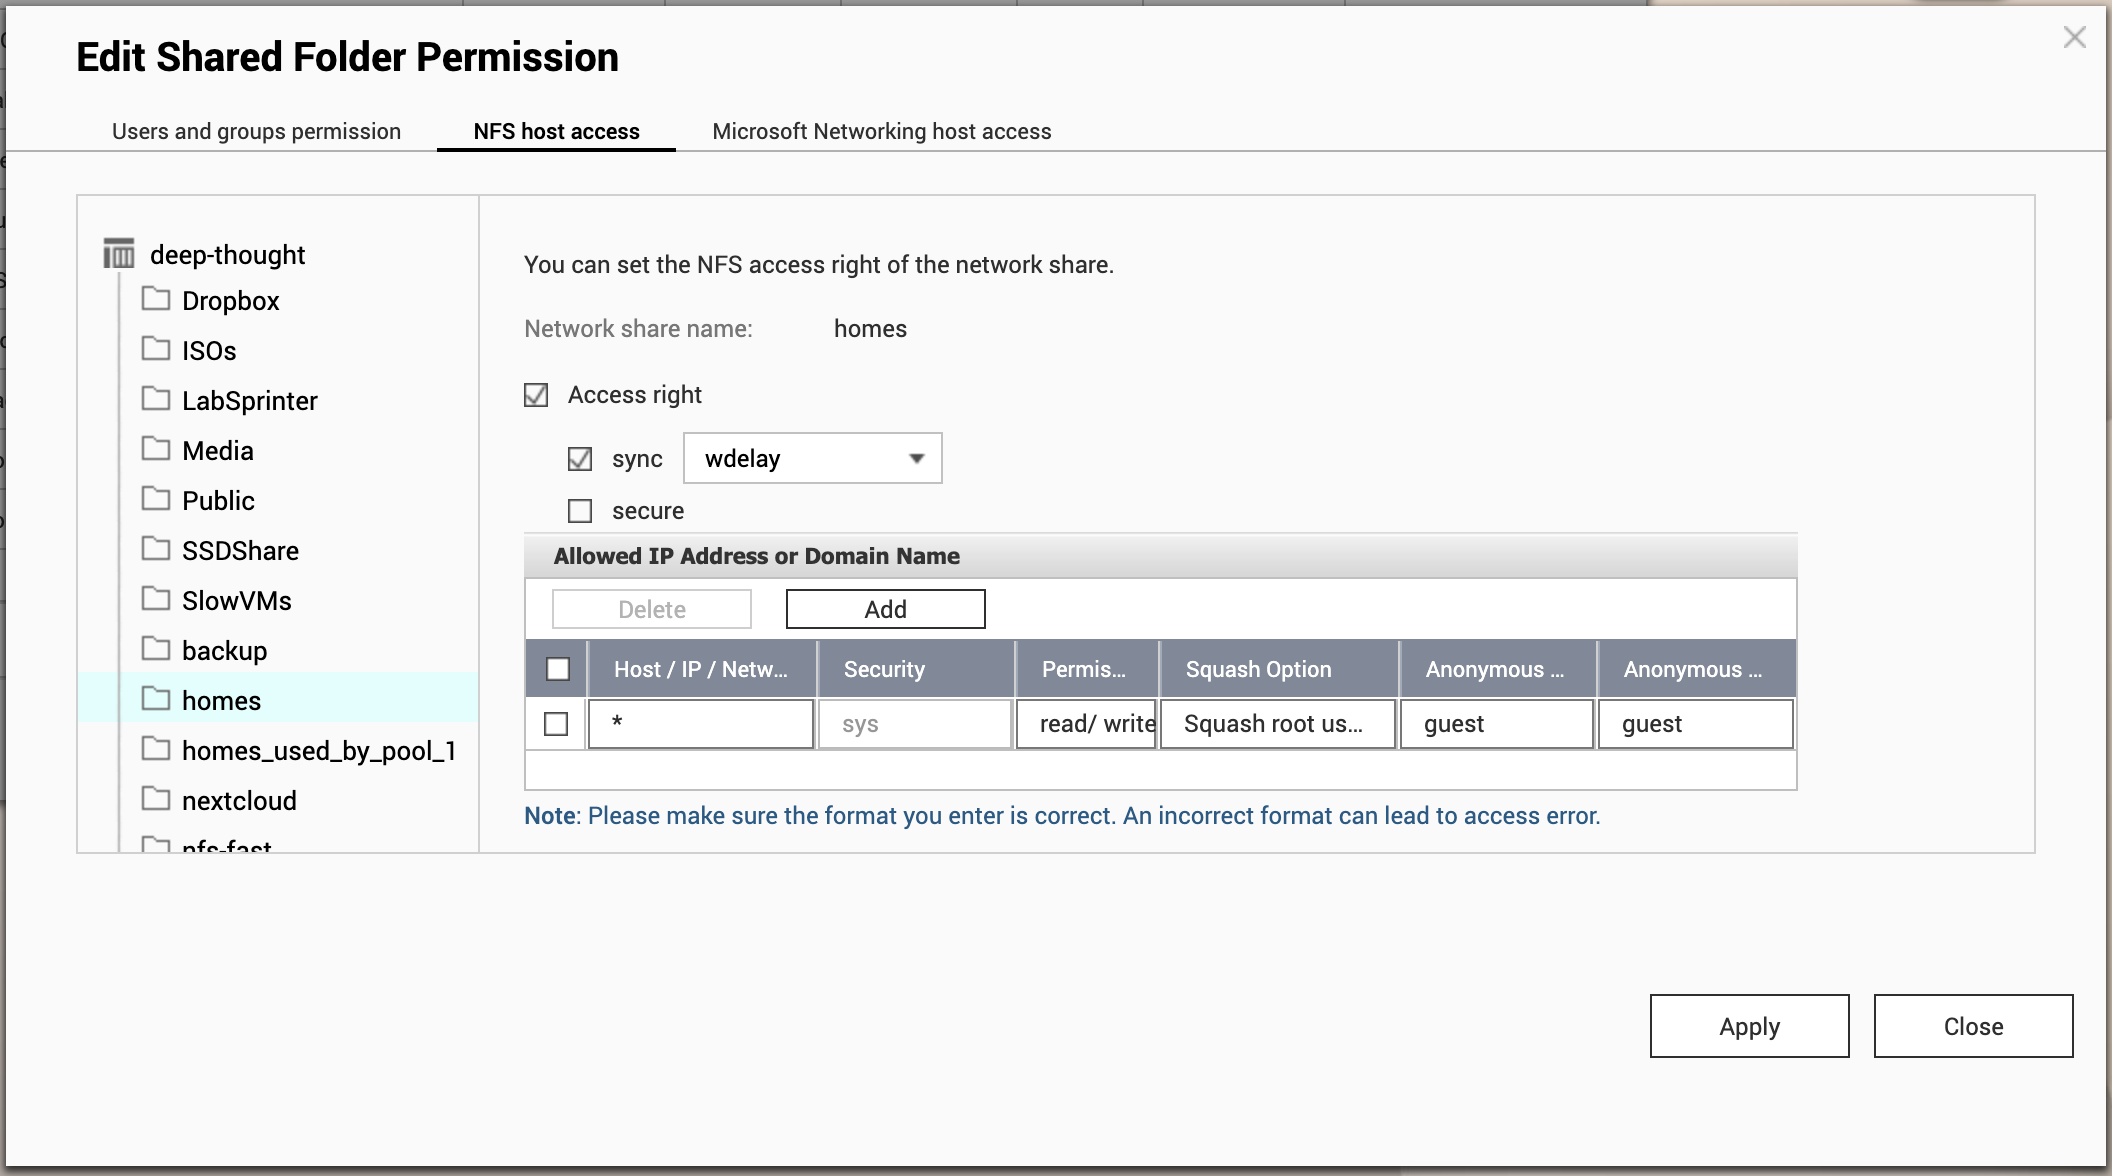
Lastly on the QNAP side, NFS permissions need to be set so that client hosts can actually mount shares from the NFS server running on the QNAP NAS.
- Navigate to Control Panel > Privilege > Shared Folders
- Click the Edit Shared Folder Permission button for the homes shared folder (the button looks like a person with a checkmark)
- Click the NFS host access tab
- Check the Access right checkbox
- Check the sync checkbox, select wdelay from the dropdown
- Add a host with a wildcard
*IP - unless you want to restrict to only certain IPs - Set the Permission dropdown to read/write
- Set the Squash Option to Squash root user, with the UID/GIDs set to guest
- Click Apply and Close
QNAP-side configuration is now complete - as long as a user logs into the QNAP panel before SSH’ing into a workstation they’ll have a folder ready to be mounted!
Red Hat IDM/FreeIPA NFS AutoFS Configuration
Now that the NFS server running on the QNAP is aware of users and is configured for access, we can set up the Red Hat IDM/FreeIPA side of things to automount those directories.
- Log into RH IDM/FreeIPA’s Web GUI
- Navigate to Network Services > Automount
- Select the default location
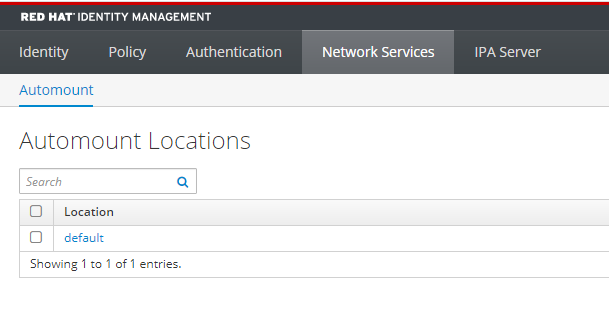
- Click the + Add button
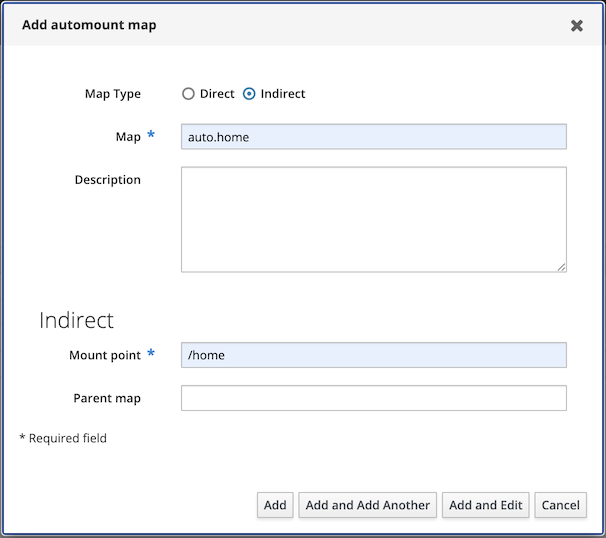
- Create an Indirect Map, with a name of
auto.home, and a Mount point of/home, unless your user homes are in a different directory - Click Add and Edit
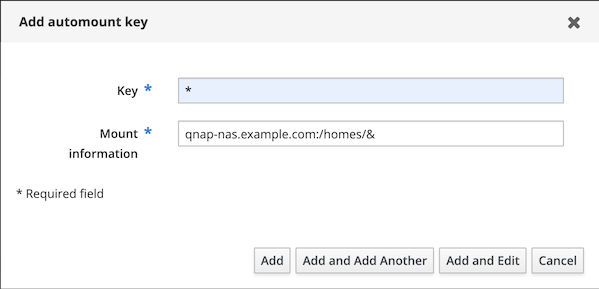
- On the Automount Keys screen, click the + Add button
- Give it a Key of
*and set the Mount information to the NFS homes export with a suffixed&to substitute the key/user, egqnap-nas.example.com:/homes/& - Click Add
RH IDM/FreeIPA is now configured to leverage the QNAP NAS' NFS server for home directory automounting - all that’s left is to configure the client hosts to authenticate to the LDAP server and automount the home directories!
Client Host Setup
Everything is in the right place for RH IDM/FreeIPA to automount the NFS shares for user home directories - all that’s left is to configure a client host to allow logins from LDAP with a few needed services.
The following commands need to be run on every host that will allow logging in via RH IDM/FreeIPA:
# Make sure to run these as root!

# Install a few packages
dnf install -y shadow-utils nano ipa-client perl oddjob zsh bash-completion autofs python3-qrcode

# Enable oddjobd
systemctl enable --now oddjobd

# IMPORTANT!!!!
# Make sure there are no existing home directories!
mv /home /home.old

# Uninstall the IPA Client if already configured, or if it was not configured with the --mkhomedir arguement
ipa-client-install --uninstall

# Install the IPA Client properly
ipa-client-install --mkhomedir

# Add the autofs plugin
ipa-client-automount

# Reboot the system
systemctl reboot
Once the system reboots you should be able to log in with a user from RH IDM/FreeIPA and have the home directory from the QNAP NAS' NFS server automatically mount!
Troubleshooting
- If your user has not logged into the QNAP web portal before they will not get a home directory.
- If your user has a home directory configured that doesn’t align to the mapped mount point it will not automount - ie, if the LDAP user has a home directory configured to
/opt/lusers/profXand the Automount Map is set to/homethen it will not mount, an additional Automount Map and Key needs to be created for the/opt/lusers/directory. - The system caches LDAP responses - try rebooting in case of errors.
- If you need to check for the actual exported path(s) from the QNAP NFS server then run the command
showmount -e qnap-nas.example.com

